Some stores may have specific handling procedures or requirements for certain types of products in WooCommerce. By displaying the shipping class, customers can understand the special handling instructions or the costs related to the shipping of particular items.
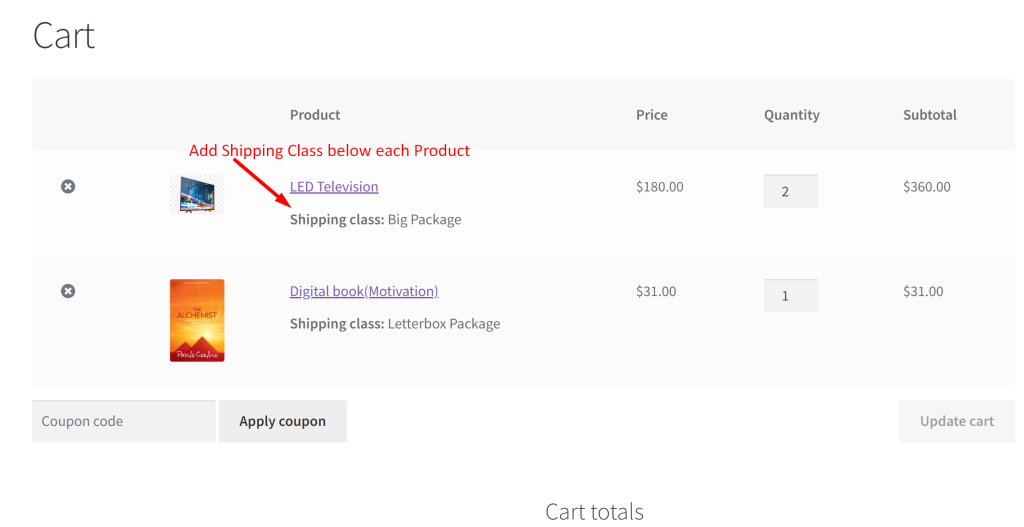
The below code will display the shipping class name below each product if it is assigned to a particular shipping class.
add_filter( 'woocommerce_cart_item_name', 'ts_class_in_item_name', 20, 3);
function ts_class_in_item_name( $item_name, $cart_item, $cart_item_key ) {
    // Only in cart page (remove the line below to allow the display in checkout too)
    if( ! ( is_cart() || is_checkout() ) ) return $item_name;

    $product = $cart_item['data']; // Get the WC_Product object instance
    $shipping_class_id = $product->get_shipping_class_id(); // Shipping class ID
    $shipping_class_term = get_term( $shipping_class_id, 'product_shipping_class' );

    if( empty( $shipping_class_id ) )
        return $item_name; // Return default product title (in case of)

    $label = __( 'Shipping class', 'woocommerce' );

    return $item_name . '<br>
        <p class="item-shipping_class" style="margin:12px 0 0;">
            <strong>' .$label . ': </strong>' . $shipping_class_term->name . '</p>';
}
Output
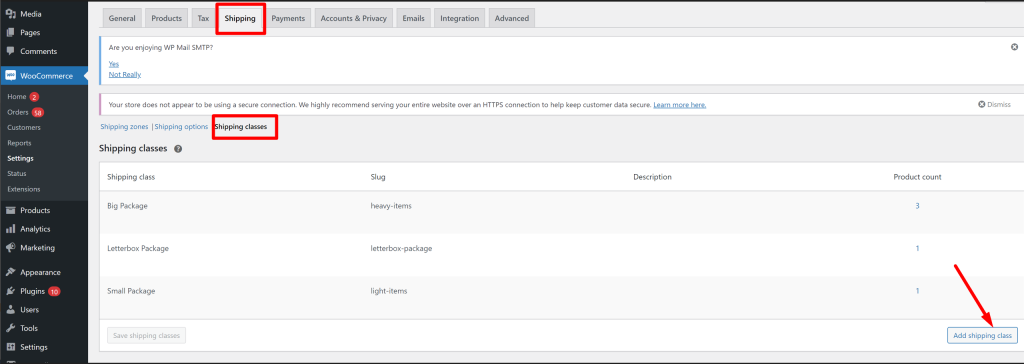
Let’s have a look at how the shipping classes are created and assigned to the products in the backend.
Create shipping classes from WooCommerce ->Settings->Shipping ->Shipping classes

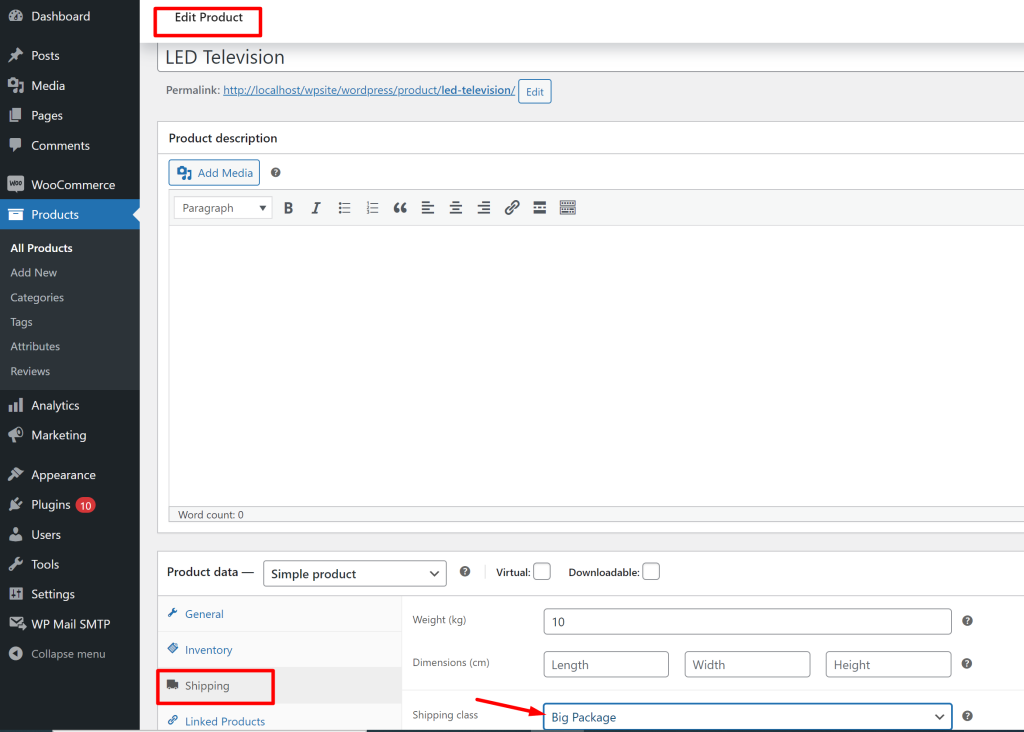
Now, assign the shipping classes for a product with the following steps.
- Log in to your WordPress admin dashboard.
- Navigate to “WooCommerce” and click on “Products.”
- Find and select the desired product from the list.
- Click “Edit” to access the product editor.
- In the product editor, locate the “Shipping” section.
- Open the “Shipping Class” dropdown menu.
- Choose the relevant shipping class for the product.
- Save your changes using the “Save” or “Update” button in the product editor.

When products are added to the cart, and if that product is assigned to any shipping class, the code will retrieve the shipping class name and display it below each product on the cart page.

Alternatively, you can also display shipping class name on WooCommerce single product page which will show the product’s associated class name below the product summary.


