Before v9.20.0 of Order Delivery Date Pro for WooCommerce, adding time slots was a long process.
- We could add only one time slot at a time.
- If we added the wrong time slot by mistake, then we would have to delete it and add it again.
- If we wanted to modify something like the lockout of a time slot or the time slot charges, then also we would have to delete it and add it again.
This was a tiresome process. If a store owner had to add many time slots, then this would take a lot of time. In v9.20.0, we have made this process easier for the store owners.
We can now add multiple time slots individually in one go, or we can add time slots in bulk with a fixed duration & interval. And we can also edit the time slots after creating them.
Add Individual Time Slots
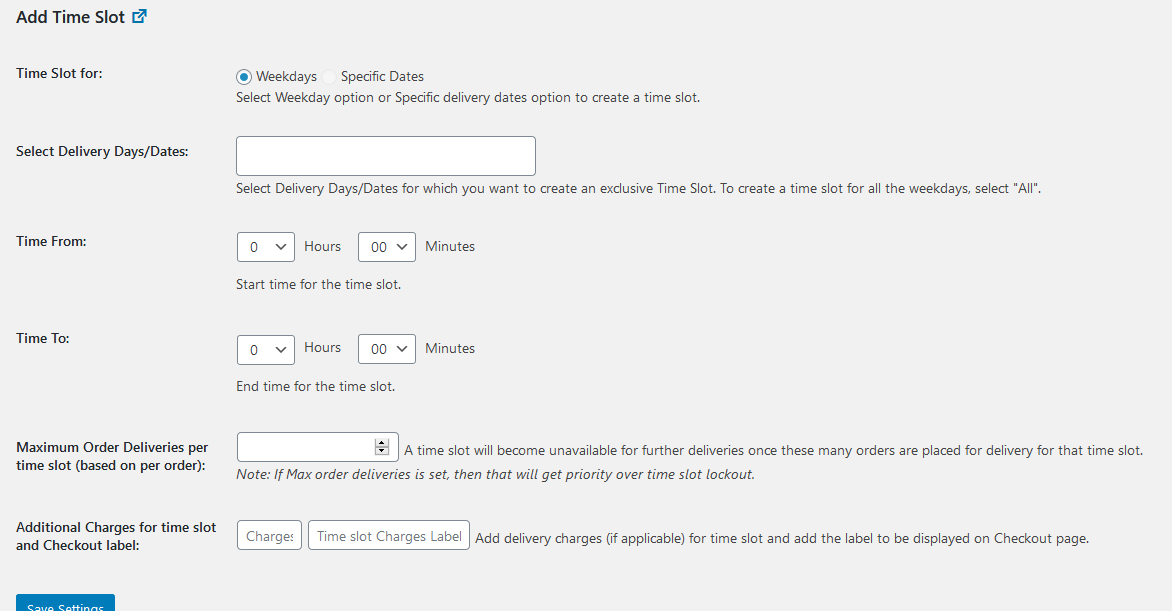
Earlier, we used to select the weekdays or specific dates, then add the ‘Time From’ & ‘Time To’ and save them. This is how the settings looked before:
In the latest v9.20.0, we can add multiple time slots for the weekdays/specific dates at once.
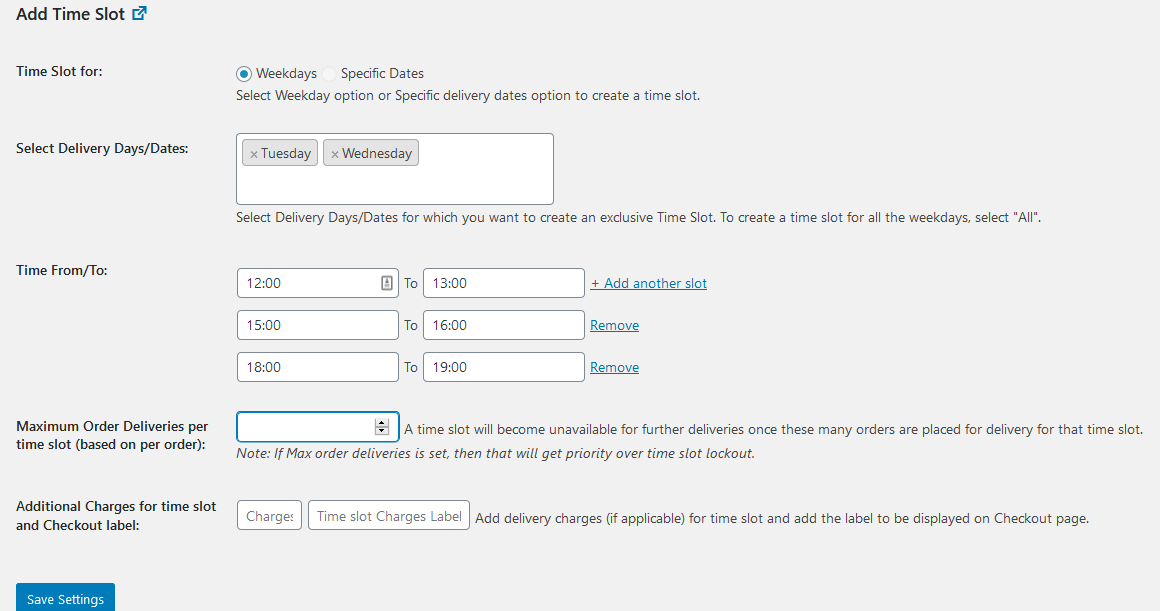
In the above settings, we create the 3 time slots: 12:00 – 13:00, 15:00 – 16:00, 18:00 – 19:00 for the weekdays Tuesday & Wednesday at the same time.
We have also changed the ‘Time Slot From/To’ input field. It was a select dropdown before, and now we have changed it to an input field with a dropdown of time slots. We can either select from the dropdown list or we can just enter the value in the input field.
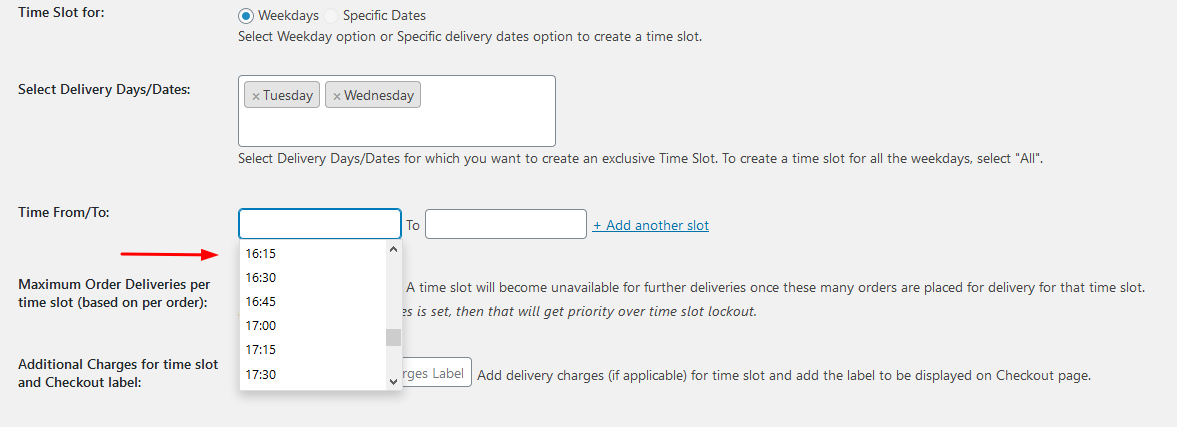
We can add as many time slots as we want at the same time. Just select the weekdays, add the time slots with ‘Add another slot’ button, and save them. This would be helpful when we want to add time slots which are not consecutive.
Add Time Slots in Bulk
If the store owners want to add multiple time slots of fixed duration then this will be a huge time saver. We select the weekdays, time slot duration, time slot interval, start time & end time. This will create the time slots starting from the ‘Time Slot Starts From’ value with the duration set until the ‘Time Slot Ends At’ value.
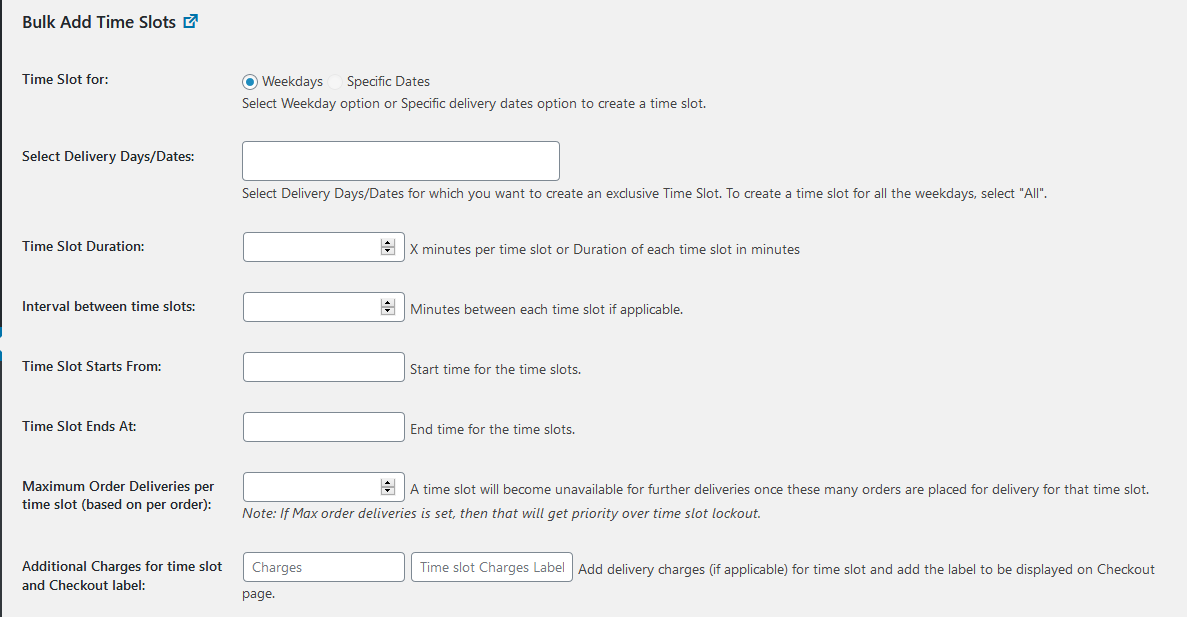
There are 2 main things in the bulk settings,
1. Time slot duration: This will be the duration of time slot in minutes. If 15 mins is set here, then the time slot will be of 15 mins.
2. Time slot Interval: This is the time in between two time slots. If 15 mins is set, then there will be a 15 mins gap in between two time slots. If there should be no interval in between time slots, then set this to blank.
Here is an example:
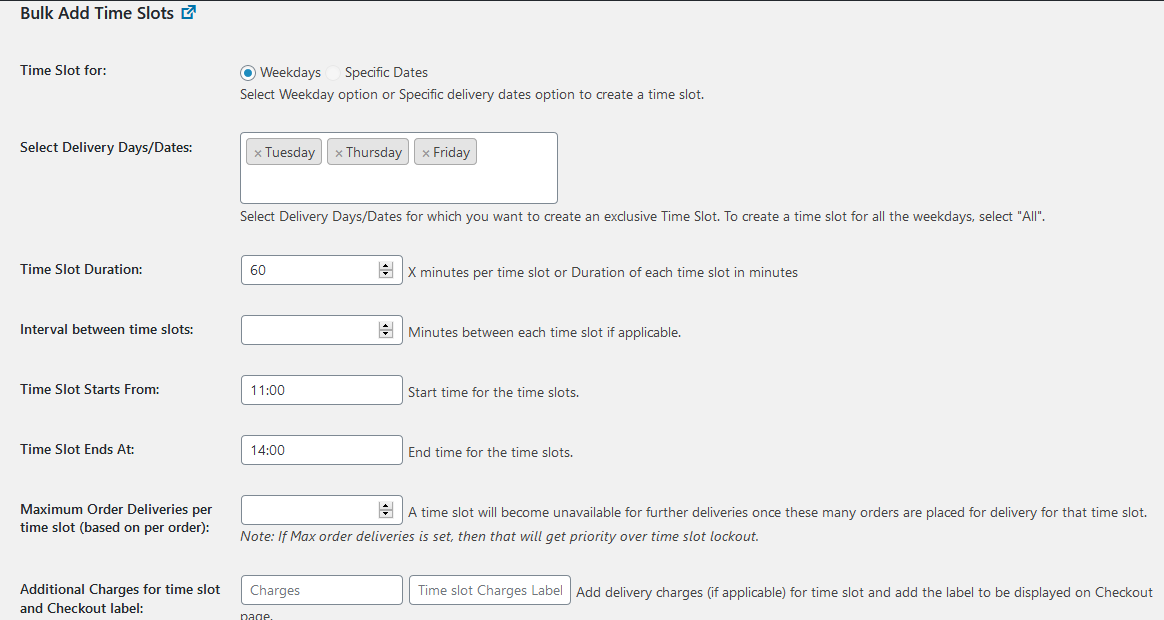
In the above settings, we have set the time slot duration to 60 mins, with the start time of 11AM and end time of 2PM. This will create the time slots: 11:00 – 12:00, 12:00 – 13:00, 13:00 – 14:00 (of 60 mins duration) for the weekdays Tuesday, Thursday & Friday.
Now, If we add the time slot interval of 30 mins, then the time slots created will be – 11:00 – 12:00, 12:30 – 13:30 (with 30 mins gap in between)
Edit time slots
When we added the time slots before, there was no way of editing them. For example, if we wanted to change the lockout value for a time slot, we would have to delete the time slot and add it again.
In v9.20.0, we have added the option to edit the time slots. This was something which many of our clients had asked for as it makes things a little easier for them.
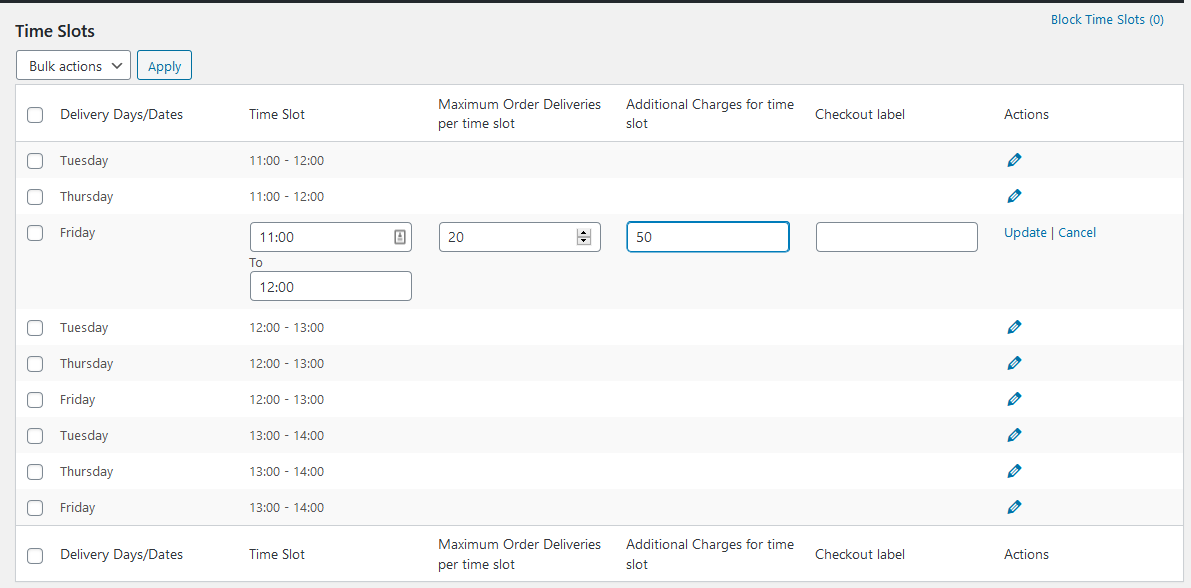
As you can see in the above screenshot, there is a pencil icon to edit the time slots. You can change the weekday/specific date settings inline and update them. We can edit a single weekday setting at a time.
Using these settings, the store owners can add & modify the time slots quickly. If you have any questions or suggestions, then please let us know in the comments below.


