You can follow the below steps for installing the Abandoned Cart Pro for WooCommerce plugin on your store.
- You need to install WordPress and then install the WooCommerce plugin.
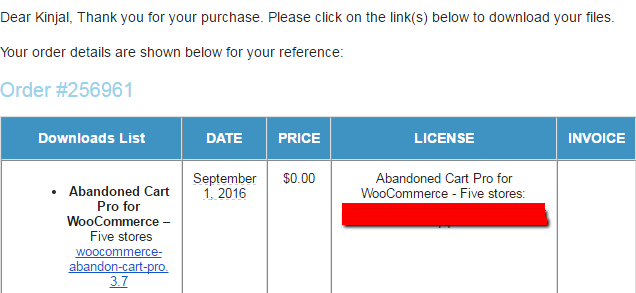
- Once the store is ready, you will need to install the Abandoned Cart Pro for WooCommerce plugin. For this, go to the email sent to you after the plugin was purchased. It will have a download link to the plugin file alongwith other details like license key, order # etc. Click on the download link ( Plugin name ) to download the zip file.

Purchase receipt
3. Once you have downloaded the zip file of the plugin, go to WordPress admin page and click on the Plugins menu from the left panel. It will show you the plugins page, click on Add New and then Upload Plugin button.

![]()
![]()
Add Plugin
4. Now click on Choose File button to select the zip file which you had downloaded on your computer and click on Install Now. This will install the plugin on your store.

Upload Zip File
5. Once installed, click on Activate Plugin option and you will be able to see that the Abandoned Cart Pro for WooCommerce plugin is now installed and activated.

Plugins page
6. Once the plugin is activated it will create a submenu named as Abandoned carts under the WooCommerce menu.

Abandoned carts
After the plugin is activated, the next thing you will need to do is to activate the license key of your purchase. This will help you to update the plugin from the Plugins page automatically. In our next documentation, we will see how you can activate the license key of our plugin.
The Abandoned Cart Pro for WooCommerce plugin is now ready to track and capture all the users / visitors who did not make the purchase on the site and thus retrieving them.
You can make necessary changes in the Settings menu as per your business requirements to start using the plugin.