Hubspot has been a very popular CRM to manage the leads and maintain sales. But it is also a great way to manage the abandoned cart tracking and the related workflows.
In this section we will learn how to integrate Abandoned Cart Pro for WooCommerce plugin with Hubspot and how you can start automating abandoned cart sequences.
To send the abandoned cart information from your website to your Hubspot CRM all you need to do is connect your WooCommerce to Hubspot via Abandoned Cart Pro for WooCommerce plugin.
This will eventually help you convert your website’s traffic to leads by automating your marketing, and business processes centrally.
The Basics
To make this integration happen, you will need the following:
- WooCommerce plugin
- Abandoned Cart Pro for WooCommerce plugin
- A paid account with Hubspot. You can log in to your Hubspot account here.
A.Install Abandoned Cart Pro for WooCommerce plugin in your store.
The first step is easy. You need to Download and complete the installation of Abandoned Cart Pro for WooCommerce plugin on your WooCommerce store.
B. Prerequisites to Create Groups, Properties, Lists & Workflows in Hubspot
Hubspot allows users to have multiple accounts attached to a single Hubspot login.
Step 1: Login to your Hubspot Account
After your login to Hubspot select your account.
By default, Hubspot does not have any data related to your cart.
Thus, in order to be able to send reminder emails we need to create this setup first:
- Property Groups – Groups are collections of relevant properties.
- Properties- Properties store specific data of each object eg. Contacts, Billing Address etc
- Lists- A list is where all the contacts which have abandoned carts on your site will be stored.
- Workflows- The workflow will allow the user to send automated emails.
Note: These property groups, properties, list & workflows are created in Hubspot automatically when you
integrate Abandoned Cart Pro for WooCommerce plugin with Hubspot on your store.
Let us now start with creating default setup of property groups, properties, list & workflows
Step 2: Obtaining API Key in Hubspot
Hubspot allows users to have multiple accounts attached to a single Hubspot login.
The only thing that Abandoned Cart Pro for WooCommerce plugin needs to connect to Hubspot is the API Key.
In order to find this API key,
go to Hubspot > Select your account > Settings > Integrations > API Key > Get Key.
The key will be displayed as shown below.
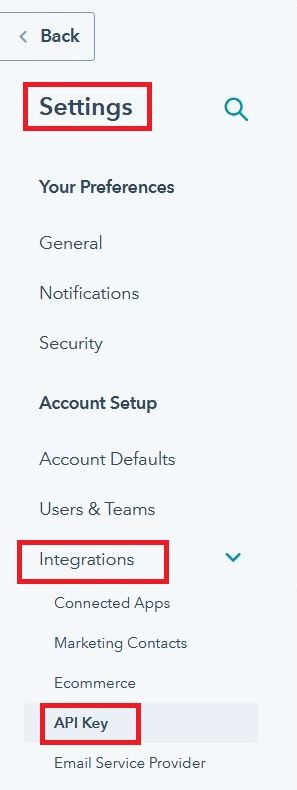

Now copy this API key and you will need it later in the Step 3.
Step 3: Connecting WooCommerce Store to Hubspot
Go to WooCommerce > Abandoned Carts > Settings > Connectors
Click ‘Connect’ on the Hubspot Option and then click on ‘Connect’ button.
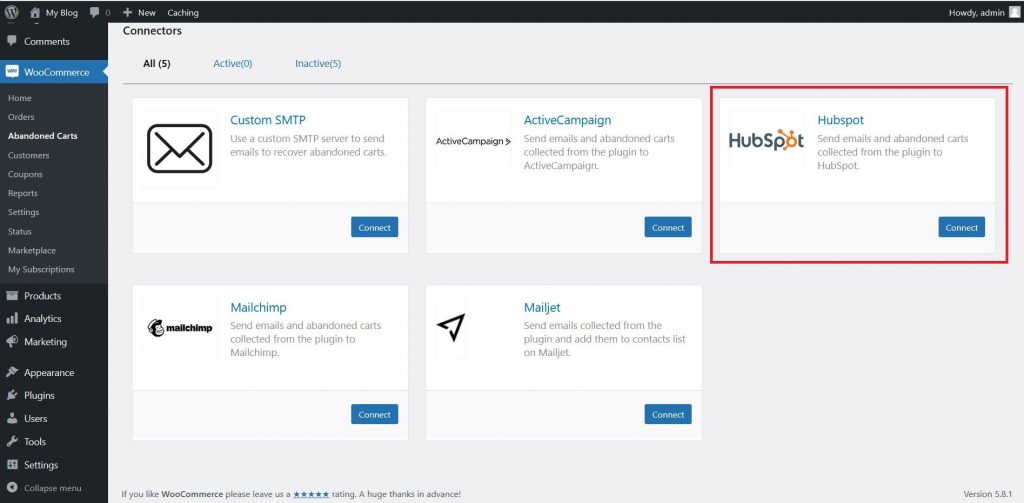
After you click ‘Connect’ you will be prompted to fill in the API key from your Hubspot account.
As you had earlier copied the API key (in step 2) now paste it in the box which appears like this.
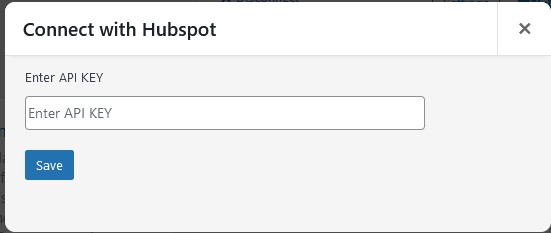
Enter the obtained API key and click on ‘Save’.
Once connected it will look like this:
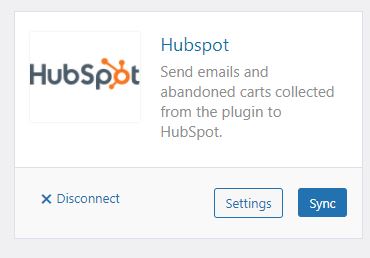
The default property groups, properties, list & workflows will get created in Hubspot automatically when the ‘Save’ button is clicked.
If everything goes smoothly, all of these will be displayed in your Hubspot account, as explained below in Step 4.
Step 4: Finding default property groups, properties, list & workflows in Hubspot
As mentioned above, all the entities will appear in your Hubspot account once it is connected to WooCommerce store.
Let’s now see how to reach them.
1. Properties
To find Properties related to the integration,
- Go to your Hubspot Account > Settings > Data Management > Properties
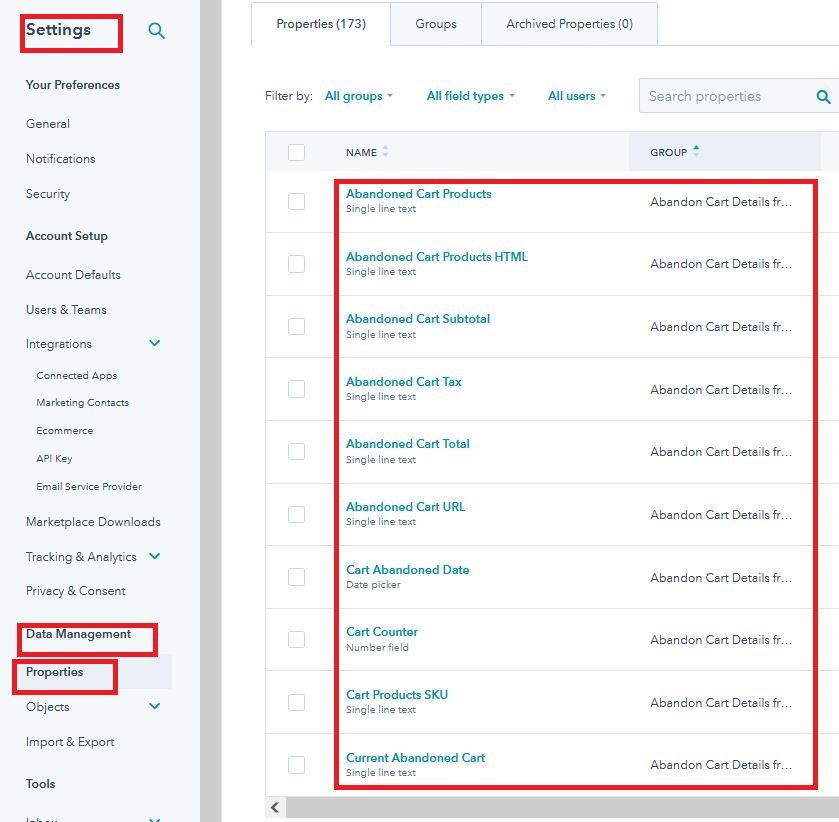
- You will notice that 10 properties relating to the ‘Abandoned Cart Details from AC Pro’ group will get created automatically.
2. Property Group
To find Property Group related to the integration,
- Go to your Hubspot Account > Settings > Data management > Properties > Groups.
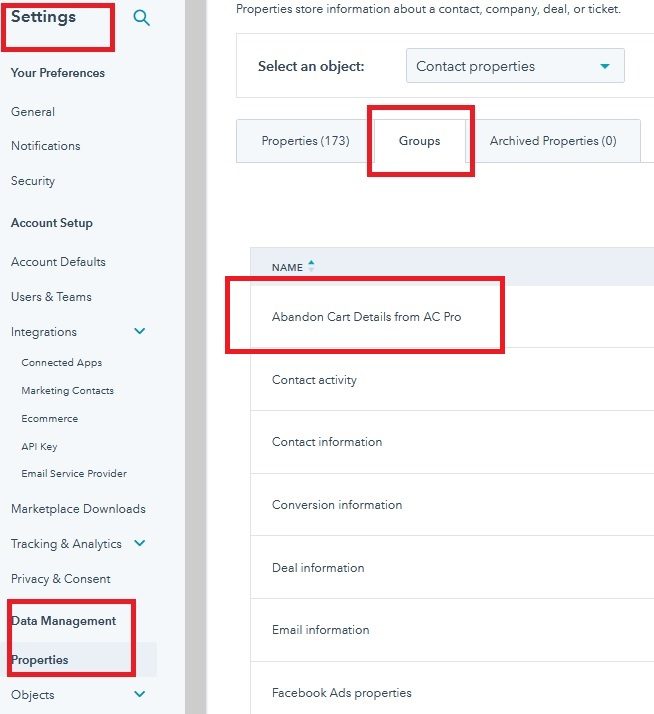
- 1 property group with the name ‘Abandon Cart Details from AC Pro’ is created.

3. Lists
To find lists related to the integration,
- Go to your Hubspot Account > Contacts > Lists
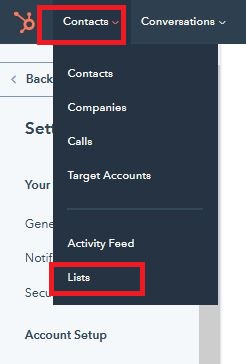
Here you will notice that 1 list is formed and gets a name – ‘Abandoned Carts List’

4. Workflow
To create workflows through this integration,
- Go to your Hubspot Account > Automation > Workflows


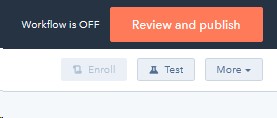
- 1 workflow is created which is OFF by default, this will be switched ON once you create a workflow .
- This needs to be in the status ‘ON’ for the workflow to function.
C. Managing Contacts
Every time a registered user or guest abandons a cart at the checkout, their contacts are are tracked from the plugin (registered & guests from the billing field at checkout)
- The email address is captured in the WooCommerce dashboard as shown below,
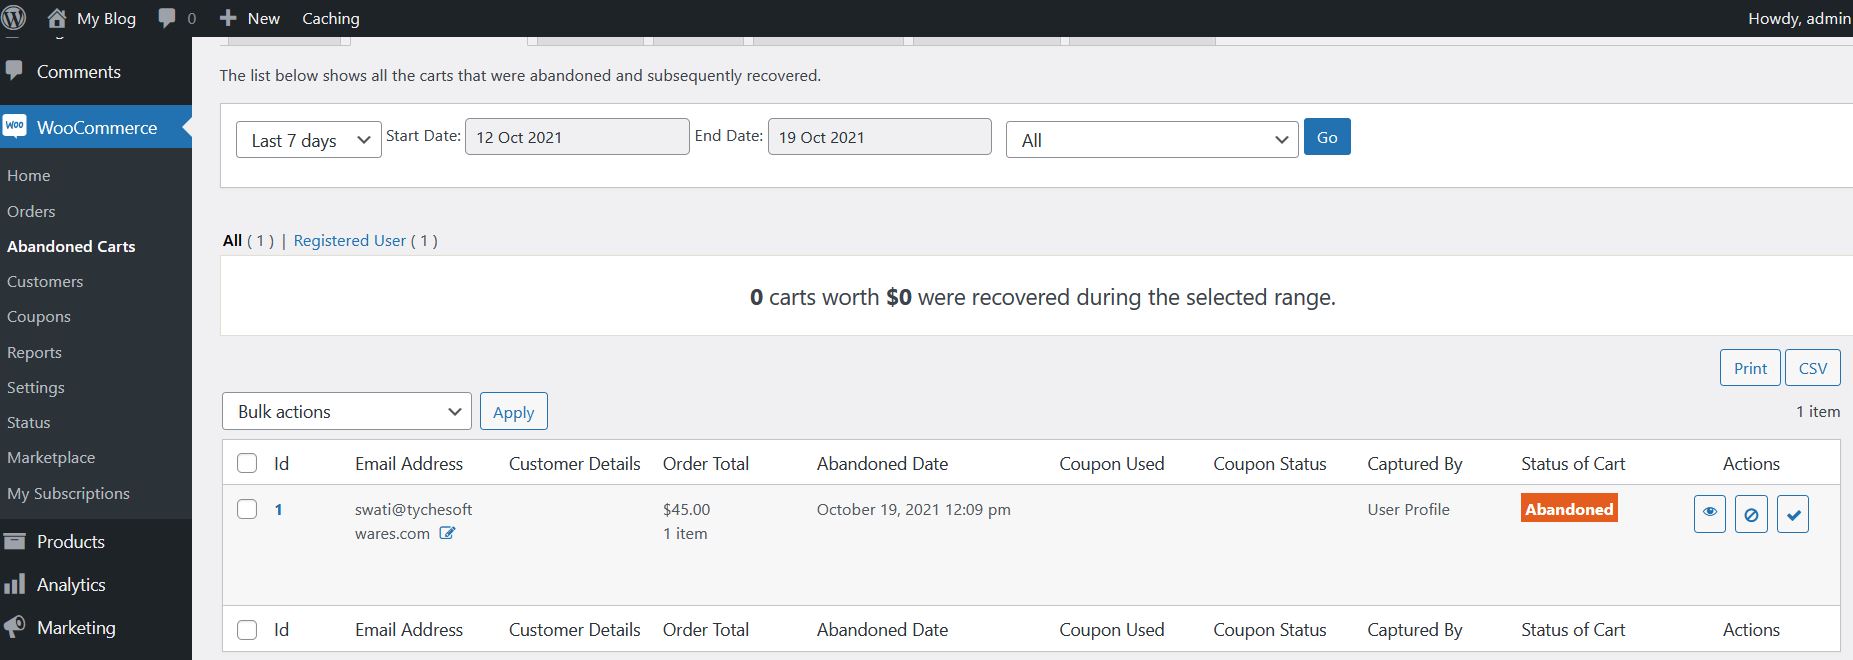
- This is then exported to Hubspot immediately.
- The same can be seen in Hubspot Dashboard in Contacts & Lists > Abandoned Carts Lists.

- The contact gets added to the list automatically because we setup a property ‘wcap_abandoned_cart’ to ‘yes’ .You will learn more about this in the workflow section below where you will be creating the automated workflow.
D. Managing Carts
- Since carts are not separate objects in Hubspot, abandoned cart details are set up in custom properties in each of the contacts.
- The same can be seen in Contacts > Select Contact > View all properties > Abandoned Cart Details from AC Pro
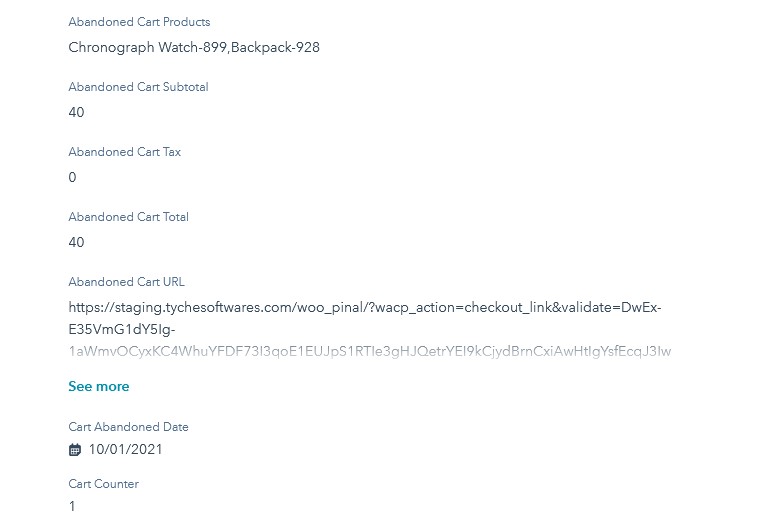
- Carts are exported to Hubspot as soon as they are created.
- If the cart is updated in WooCommerce then the same will get reflected in Hubspot as well.
- Usually it does not take more than a minute or two for the changes to be reflected.
E. Begin Creating Workflows
Now that all the background prerequisites are set, the next step is creating an Abandoned Cart Email Series for your customers with the help of ‘Workflows’.
Workflows are necessary to send automated reminder emails. Note that Workflows are NOT available in the free account of Hubspot since it’s a paid feature.
The default workflow created by Abandoned Cart Pro for WooCommerce plugin is setup such that contacts
are auto-added to the workflow when the contact has a property ‘wcap_abandoned_cart’ to ‘yes’
1. We’ve set up a default delay of 30 mins in the workflow. The same can be edited by the user as needed.
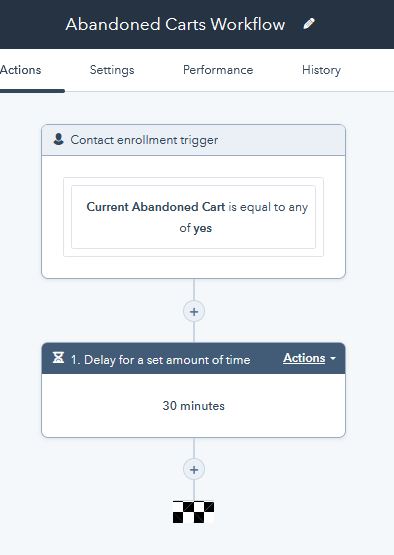
2.Emails can be added to the workflow as below:
- Add an action by clicking on the ‘+‘ sign .
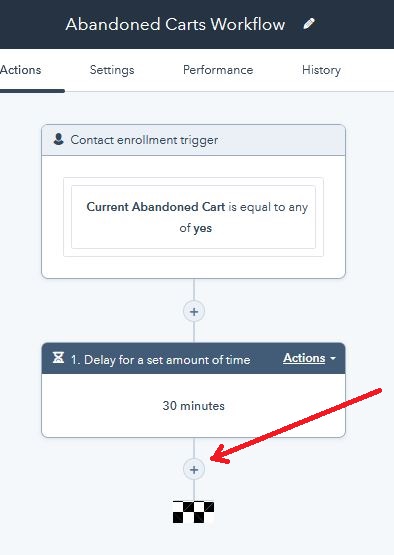
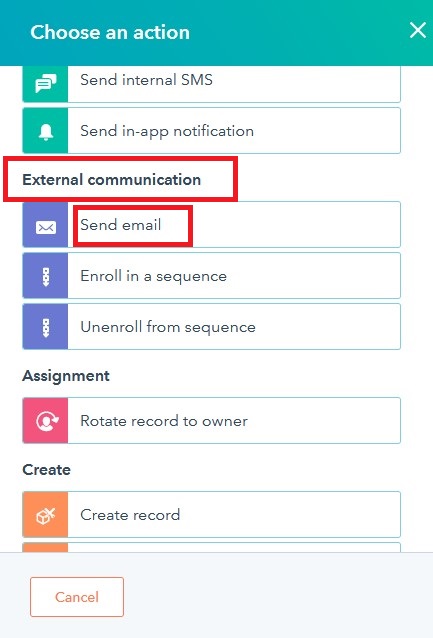
3.Now a sidebar will pop up next to the workflow. Here you can choose an action you want to perform.
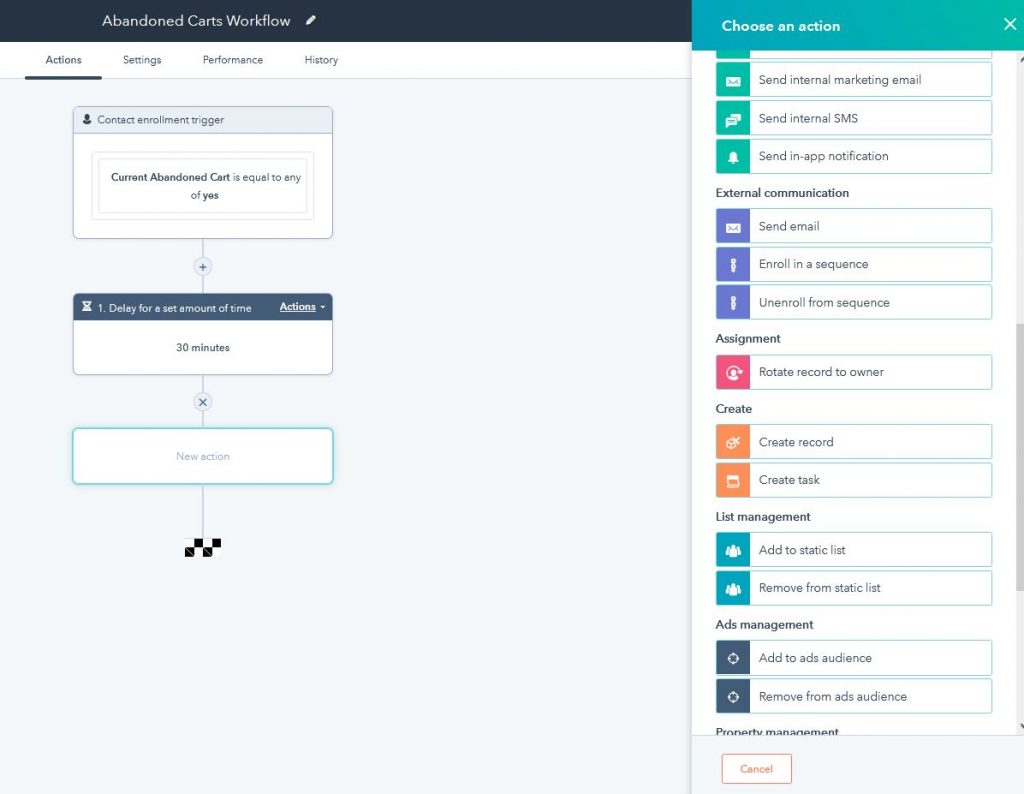
4.To create an email, go to External Communication > Send email
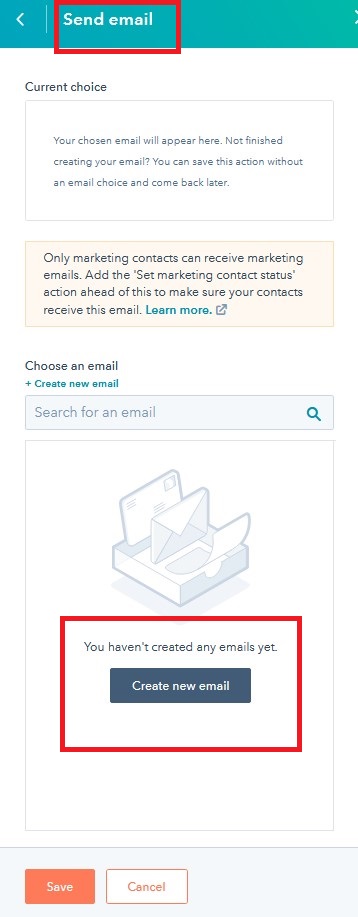
5.Now a window with an Option ‘Create new email’ will open up. Click on the ‘Create new email’ button.
- Now another window will open with all the options to create and customize your email.
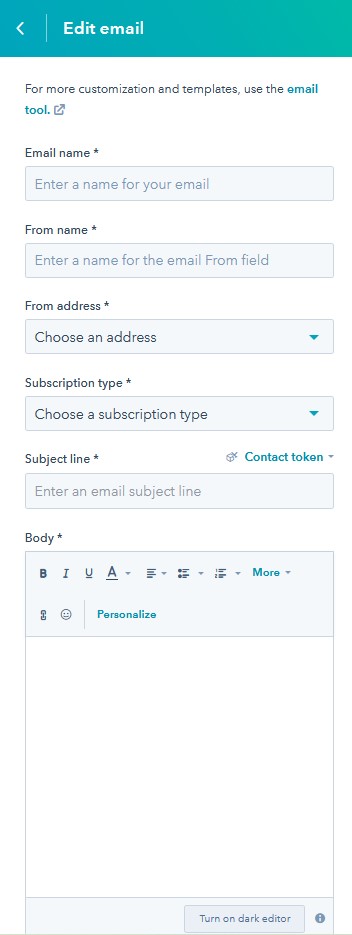
- You can personalize this email that will be received by your customers, the way you like it.
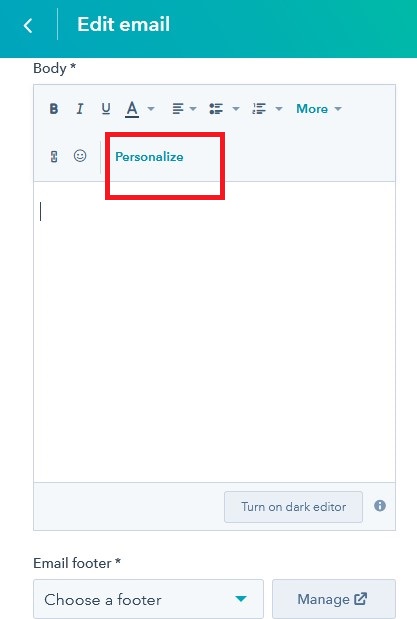
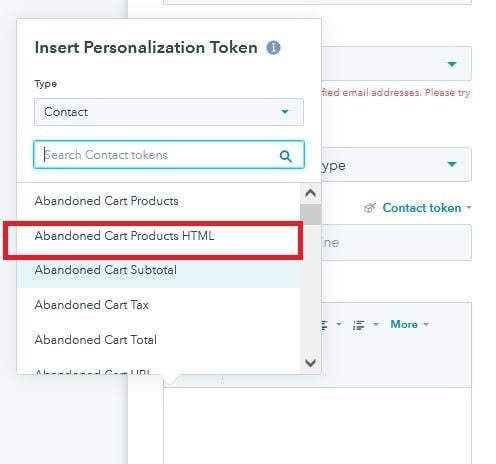
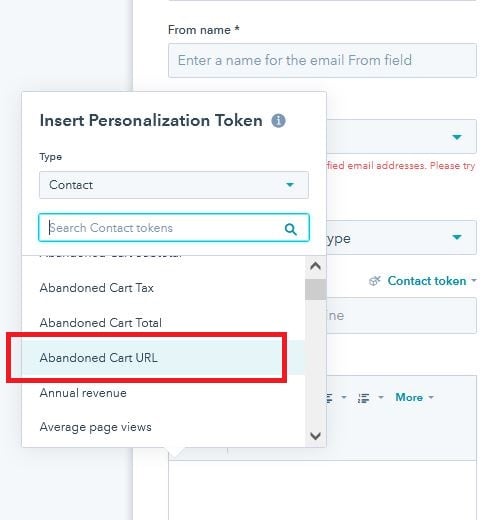
To add cart details (which are saved as properties), you need to add customized tokens.
- This can be done using the ‘Personalize’ Option
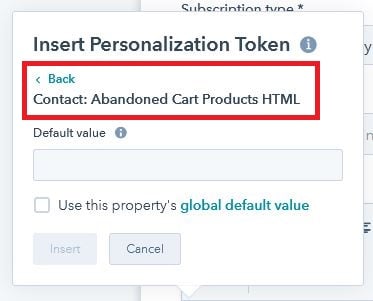
- Abandoned Cart Products HTML token is used for the cart table.
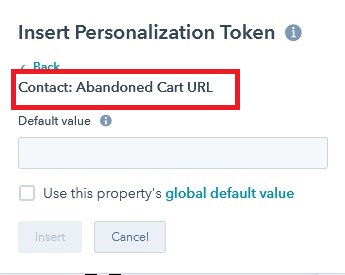
- Creating the Checkout URL:
- More such tokens are available and can be set up as needed.
- Once you are done planning all your actions, you need to Click on Review & Publish button to switch ON the workflow.
- The ‘History’ section under ‘Abandoned Cart Workflow’ shows a history of all the email addresses to which emails have been sent.

Waiting periods to perform a particular action can also be customized in the workflow, so if a contact is waiting for the time to be reached, the contact is considered an active contact.
Apart from the default workflow, you can also create your own workflows in Hubspot.
While creating this you need to ensure the trigger is included correctly to ensure all the email addresses exported by Abandoned Cart Pro for WooCommerce plugin are included in the workflow.
We hope this section has been helpful in providing required information to connect your store to Hubspot and start automating your leads and maximizing profits!
If you’re still unsure about how to set up the plugin or want to maximize its potential, you can always contact our experts to learn some best practices to do it.