In v8.18.0 of Abandoned Cart Pro for WooCommerce plugin, you can now connect our plugin to Sendinblue. This marketing automation tool can help you out with Emails, SMS, and more!
Using the integration, you will be able to customer email addresses and abandoned cart information as well to Sendinblue. Once they’ve been sent, you can send reminder emails and more to these shoppers!
The Basics
To make this integration happen, you will need the following:
- WooCommerce plugin
- v8.18.0 of Abandoned Cart Pro for WooCommerce plugin
- a valid account with Sendinblue. You can log in to your account here.
We will need to grab the API key, Marketing automation key and then create an Abandoned Cart Workflow.
A. Sendinblue Admin settings
A. Getting the API Key and Marketing automation key:
Go to your Account > SMTP & API to fetch the API key.

You will have to create a new API Key if one does not exist already for you. So, click on the ‘Create a New API Key’ button.

Enter the name you would like to give to this API Key and click on ‘Generate’.

Now, you need to copy this key once it’s generated. Please make sure to copy the key correctly and save it somewhere because Sendinblue does not allow us to copy the key at a later stage.

After clicking on ‘OK’, your newly added Key will be saved and the following message will be displayed:

Now, you need to grab the Marketing Automation Key. For this, go here and select JS tracker.

Scroll down below to find the JS code. Find the words client_key and copy the key located just beside it.

This client key is the Marketing Automation Key. We will require these two keys later when we go to section B. WordPress Admin Settings.
B. Creating an Abandoned Cart List
To ensure that all the new abandoned carts contacts from your WooCommerce store get saved in one place, you need to create an ‘Abandoned Carts’ list. Go to Contacts > Lists > Add a new list.

Enter the name ‘Abandoned Carts’ and click ‘Create an empty list’. You can name this list to whatever you would like.

It will appear like this once this list is created:
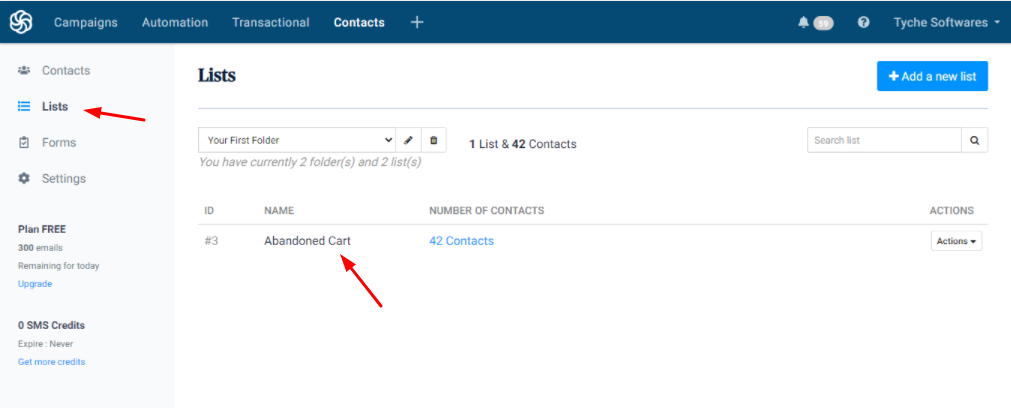
If you wish to skip this step then you can do so. When connecting the Abandoned Cart Pro plugin, if no list is available in the Sendinblue account, our plugin will create one for you.
C. Creating a Workflow
Next, you need to create a workflow. Go to Automations > Workflows > Create a Workflow.

Select the template Abandoned Cart and click on the Create button.

It will display the trigger point a.k.a the start point for the workflow like this:

After clicking on ‘Next‘, you will have to add a delay. Add as desired:
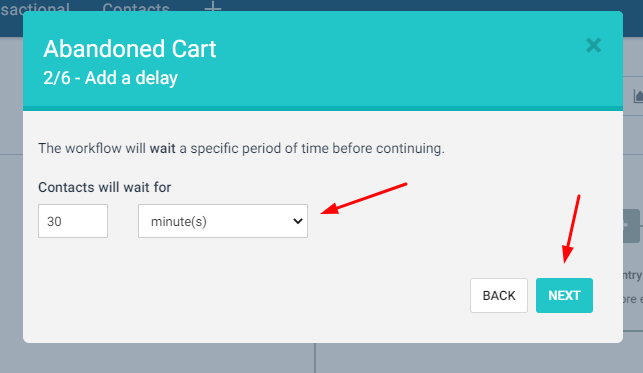
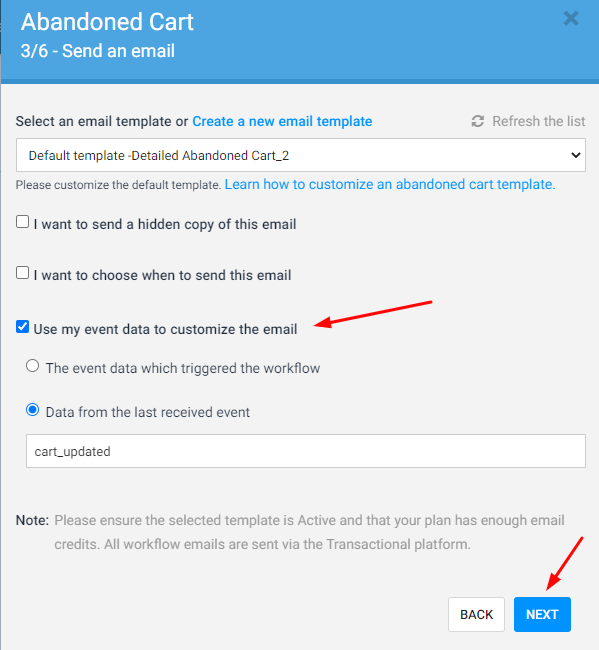
Since you’ve selected the default Abandon Cart template, all the desired merge tags for cart data will already be present. Use the same.
Now, you will have to set the exit workflow option. Choose Custom Event and add order_completed.
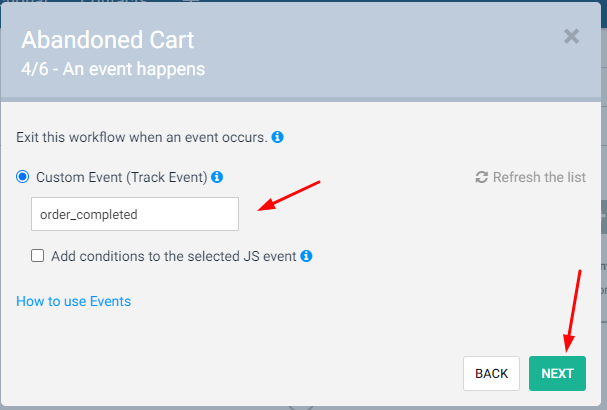
You will have to add other events too. Such as cart_deleted:
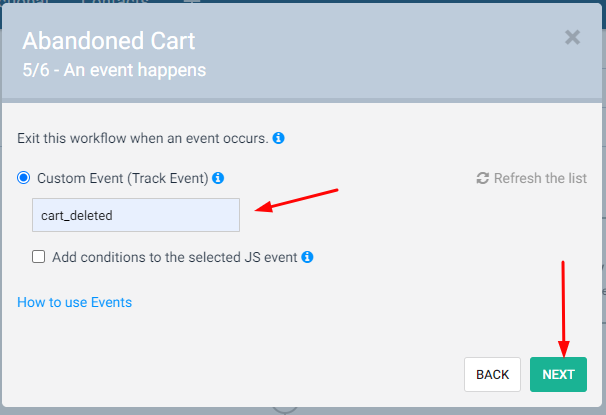
And cart_updated. Click on Finish, once done. All of these steps are available by default in the ‘Abandoned Cart’ workflow. You may simply have to click on ‘Next’ when the pop-ups/prompts appear.
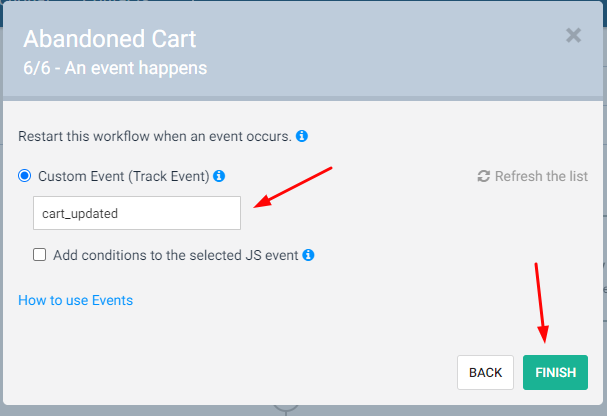
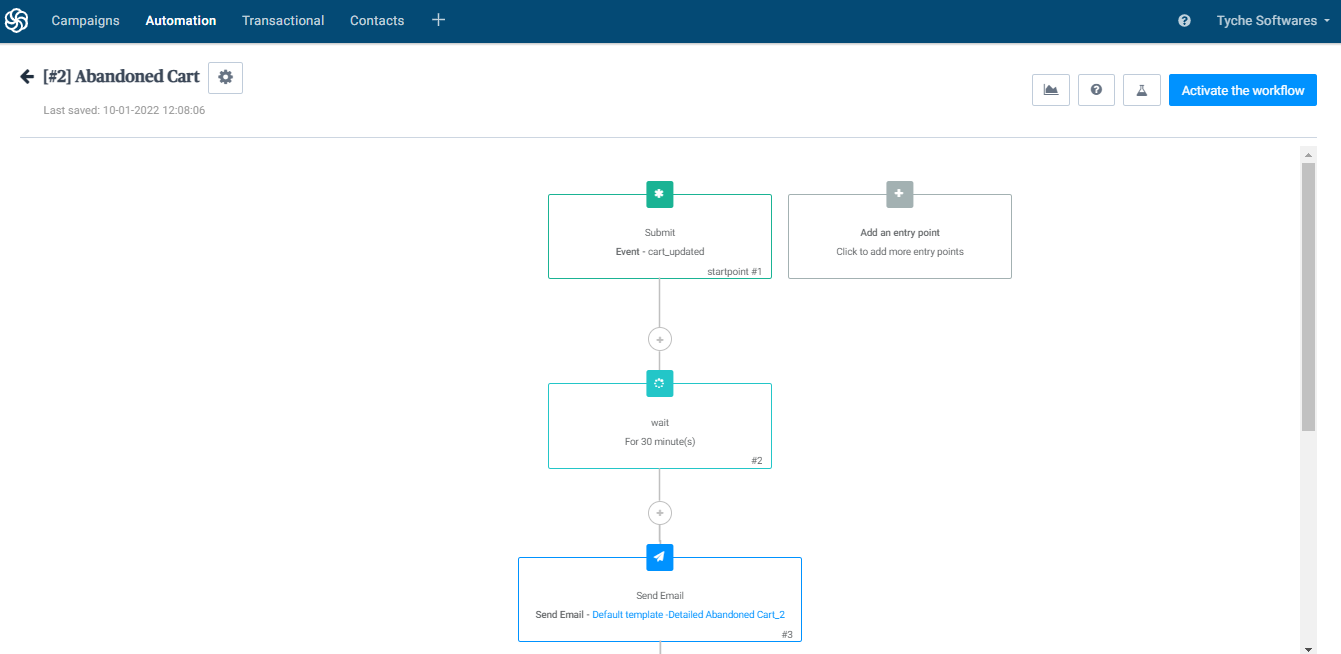
All of the Existing Settings of your workflow will appear as such:
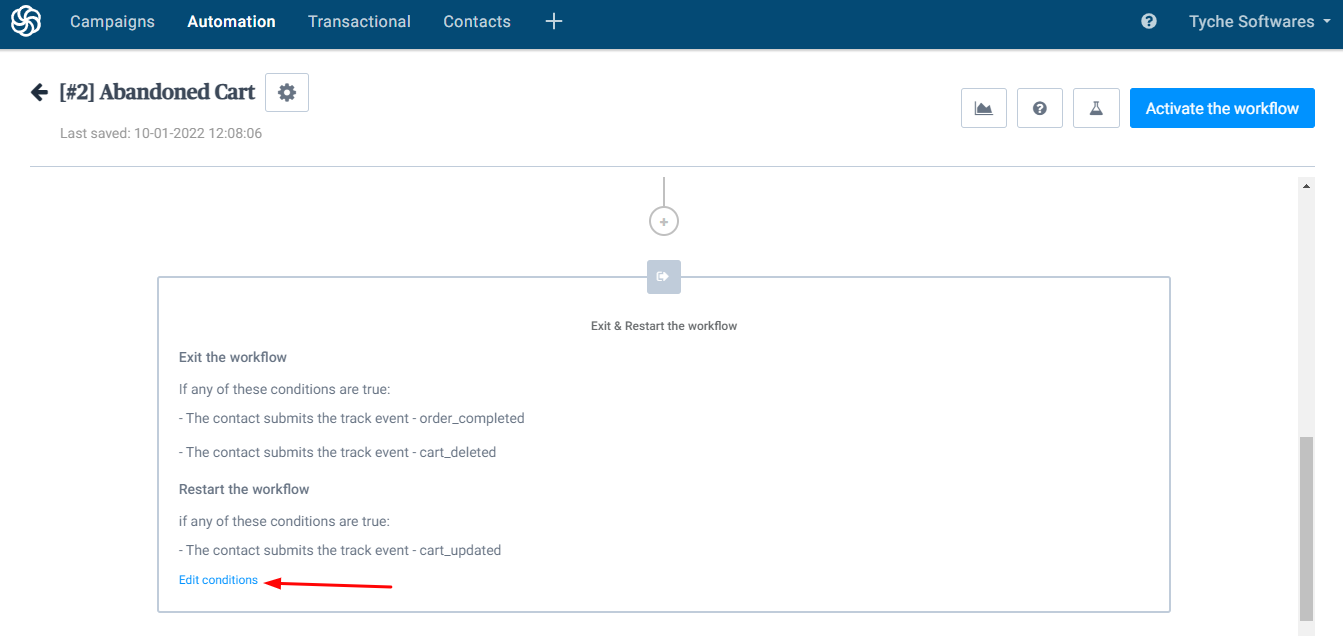
You will now have to Delete the restart condition by clicking on Edit conditions:
Click on the Delete option:
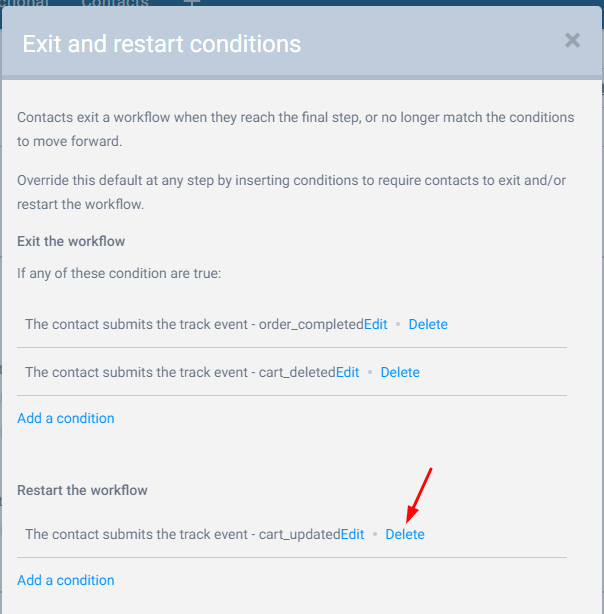
Press ‘Yes, Delete it’.

Thus, your final set of exit conditions will appear like this:
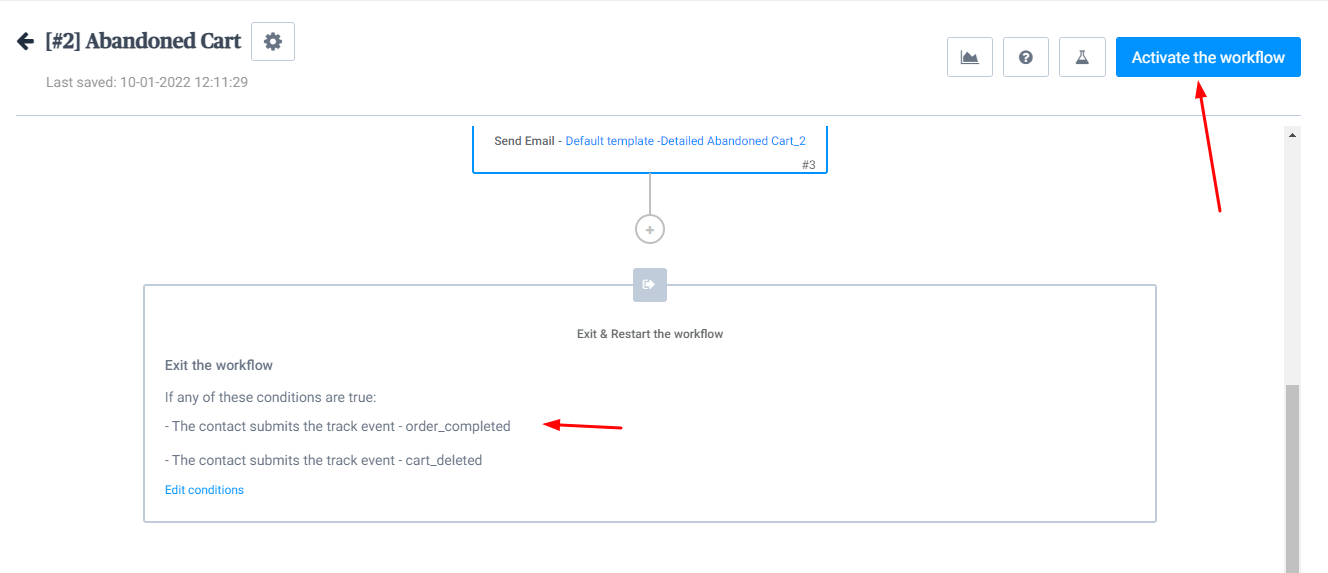
Lastly, activate the workflow by pressing the button on the top right corner. Your activated workflow will look like this under the Workflow section:
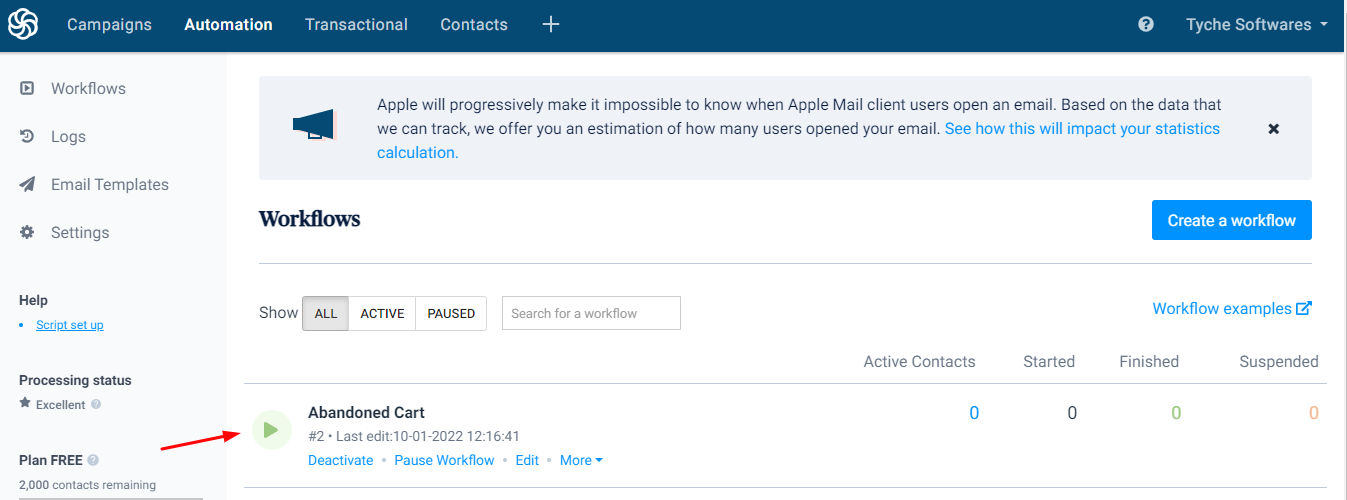
Note: Along with activating your workflow, you will also have to ensure that the email template that you have added in this workflow is activated. If you wish to make any changes to the email content then follow these steps:
Go to Campaigns > Templates. Here you find all your email templates. Let’s press the Edit option of the email template that we had added to our workflow:
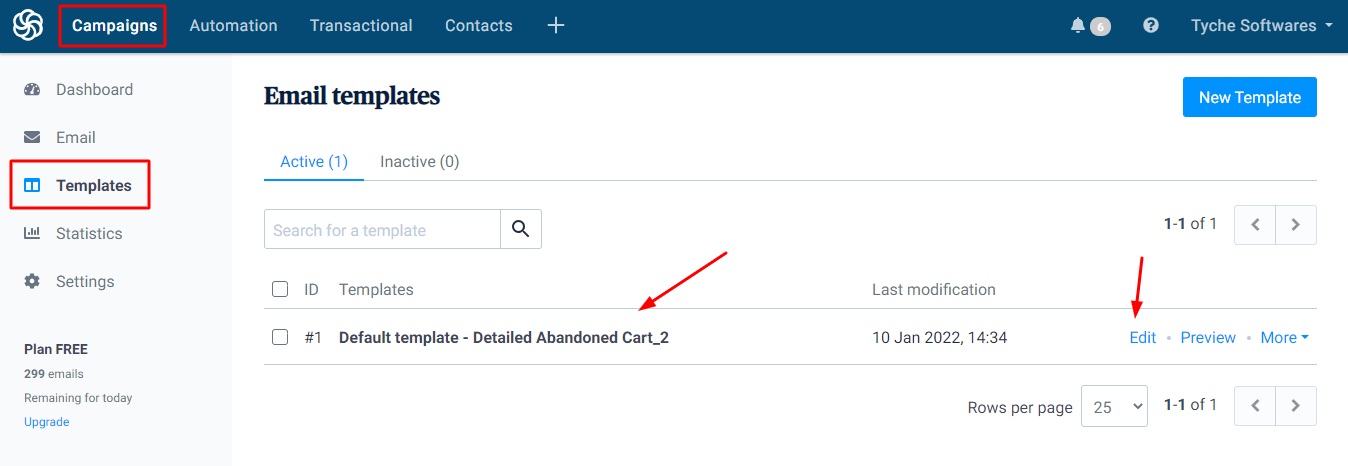
Click on Edit email content:
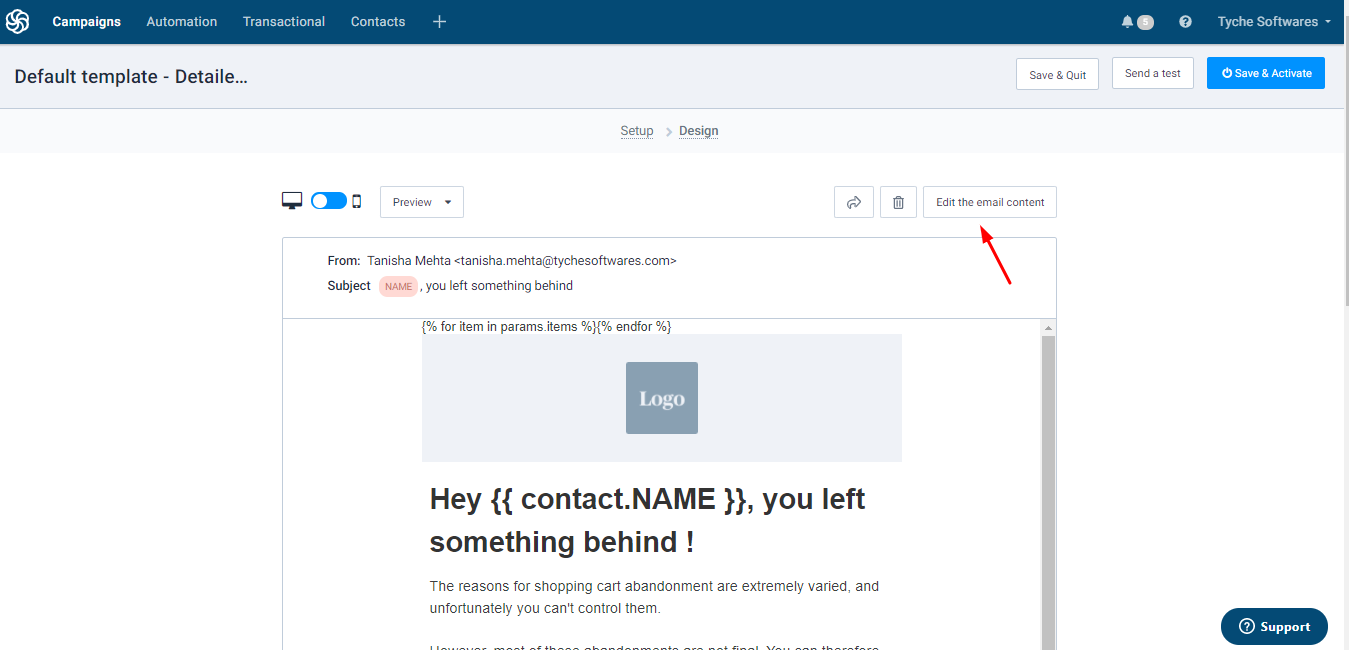
Now you can add the logo of your business or edit the default text to whatever you would like:
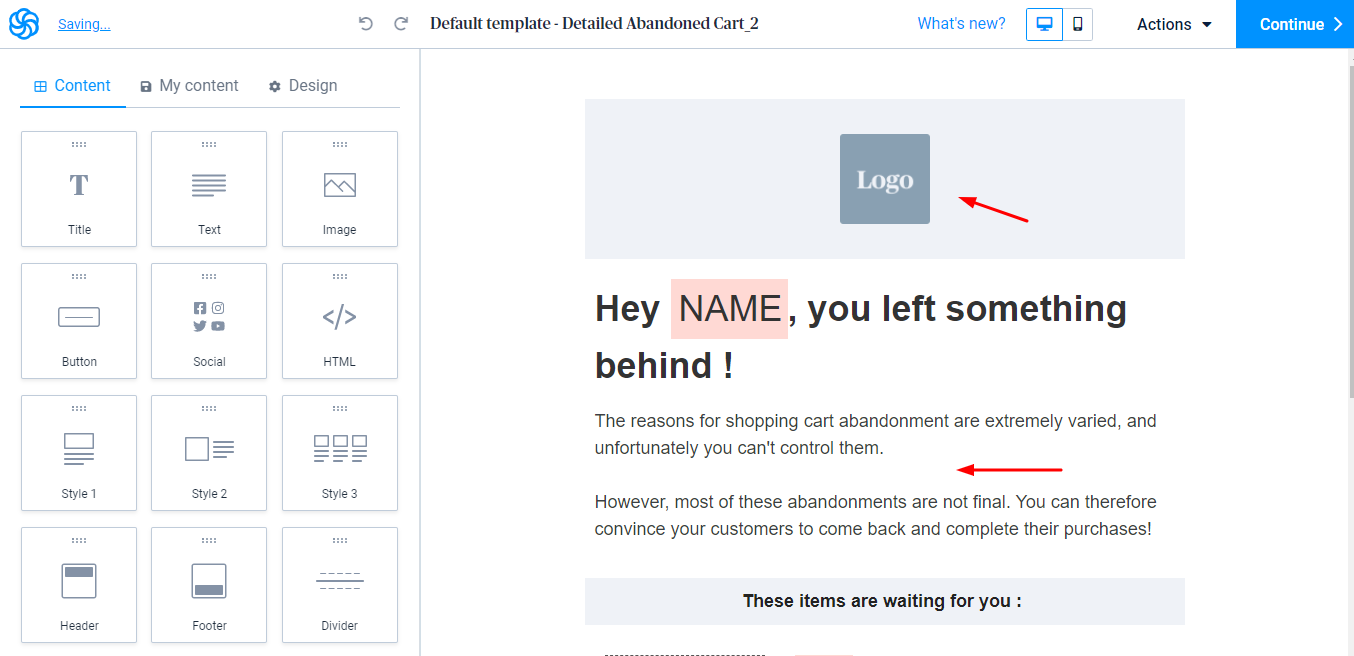
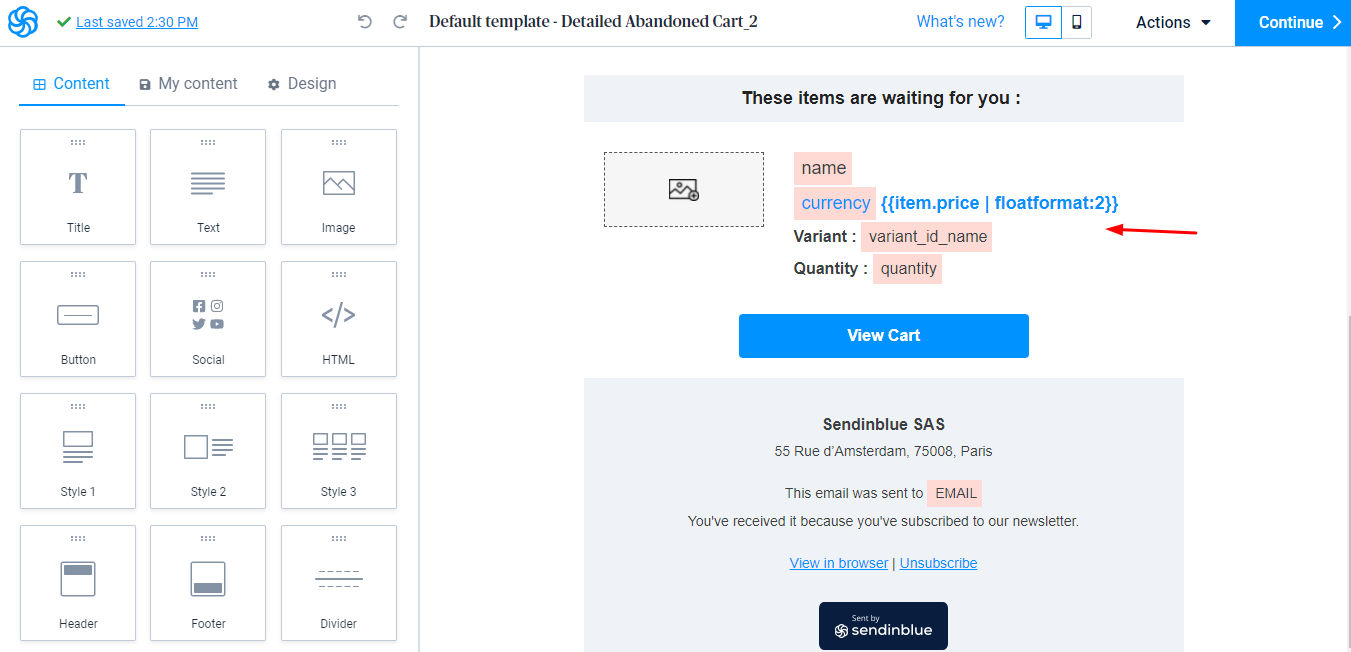
You can even edit the merge tags of the abandoned product. For example, you can change the default merge tag {{CONTACT.NAME}} to {{CONTACT.FIRSTNAME}} which is the default tag used for firstname in the contact.
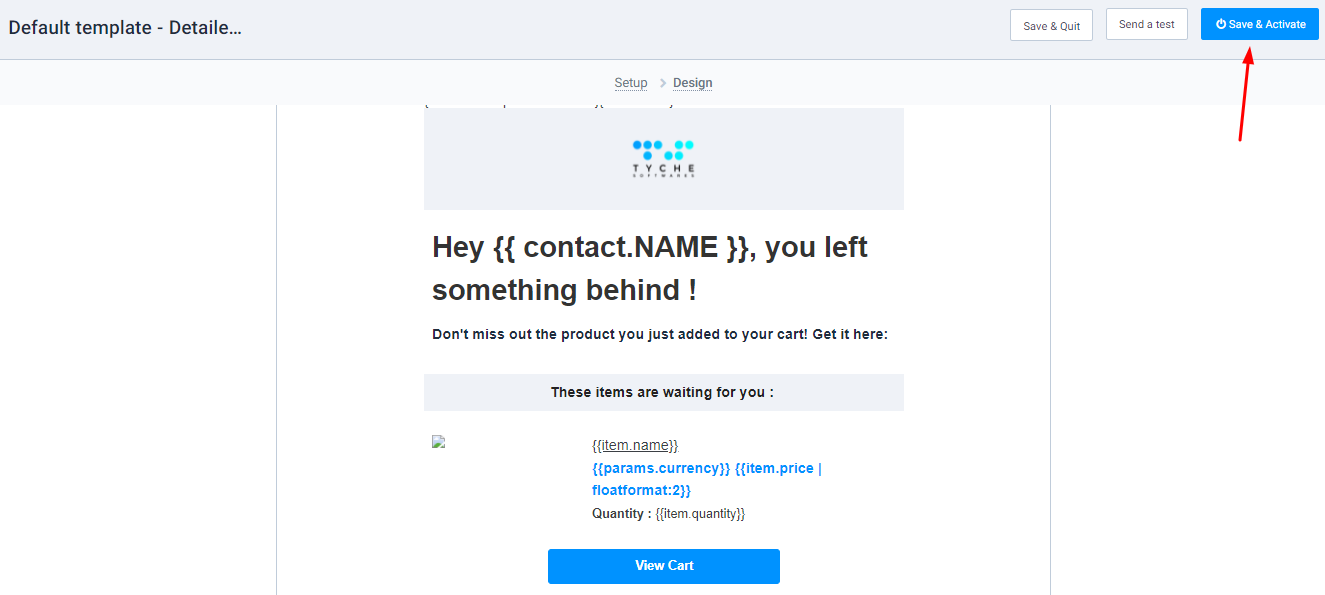
Once done, click on the ‘Save & Activate’ button.
B. WordPress Admin Settings
Once all the settings have been created in Sendinblue, it’s time to now head over to your WordPress Dashboard.
Go to WooCommerce > Abandoned Carts > Settings > Connectors.

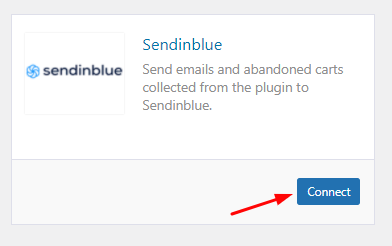
Scroll down and select the ‘Connect’ option for Sendinblue:
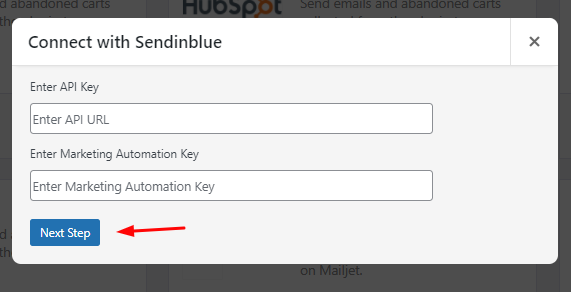
Enter the API Key and the Marketing Automation Key that you had noted down earlier. Click on ‘Next Step’:
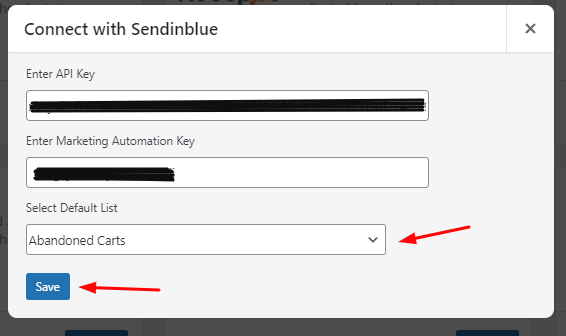
You will be displayed all the lists found in your Account. Select the list of your choice. We will go with the ‘Abandoned Carts’ list and click on Save.
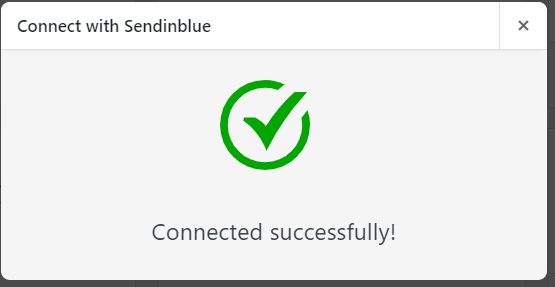
Once the connection is established successfully, the plugin will display this message!
Now, let’s say that a customer abandons their cart in your store. The product that they’ve abandoned is a ‘Designer Scarf’. This guest user has only entered their email address which was captured by the ATC modal of our plugin. The abandoned cart reminder email will thus be sent from Sendinblue and it will appear like this:
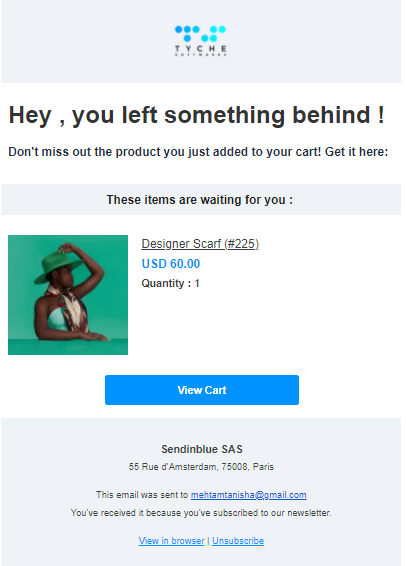
Now if you wish to view the details of this abandoned cart in Sendinblue, then you can go to Contacts. Here, it will simply show the email address, first name & last name which was exported. Please note that no cart events will be displayed in Contacts.

Next, if you wish to check if the cart was exported properly then go to Automation > Logs. It will show you the detailed steps of what happened to the newly added contact.
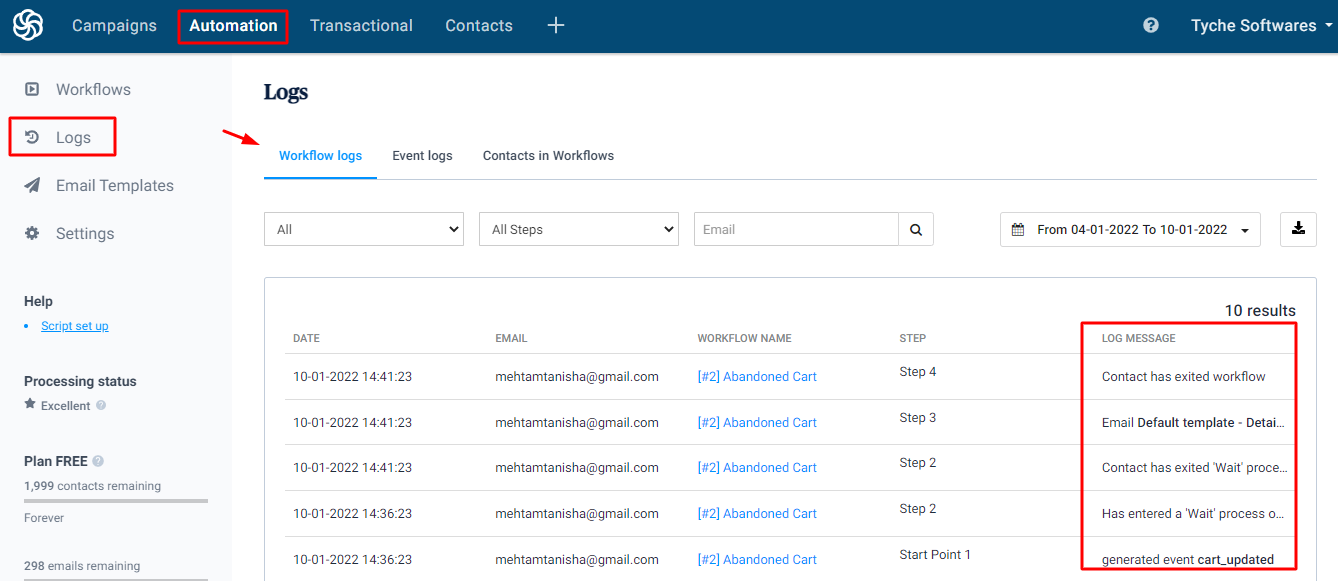
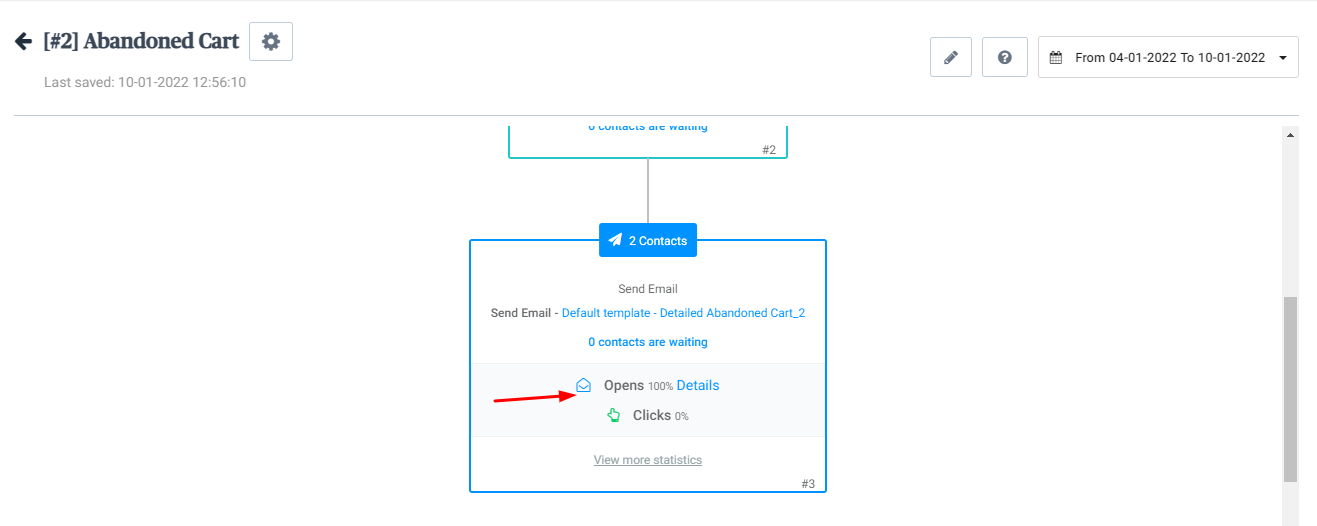
Furthermore, if you wish to view the Workflow stats, then go to Workflows > [your workflow] > Stats
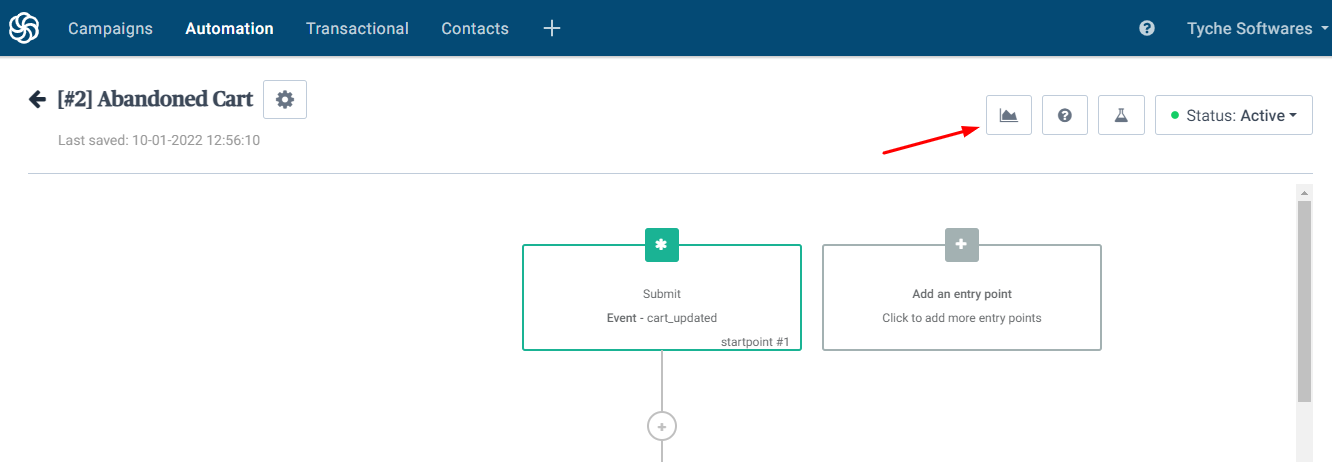
It will show you the number of contacts that were added to the workflow, how many contacts received the reminder emails, etc:
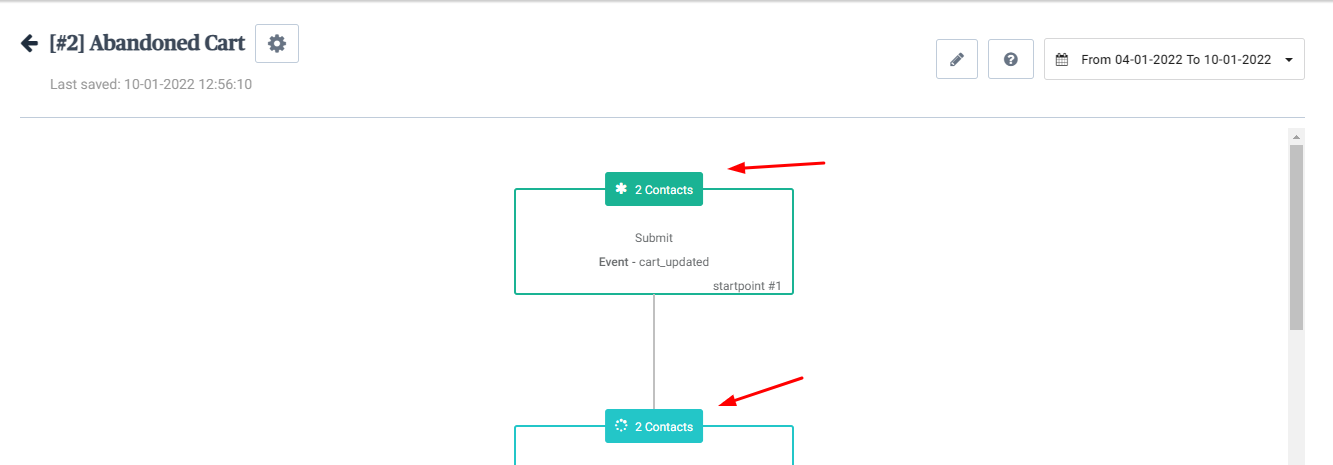
Lastly, it will show the open rate for the emails sent!
In conclusion, you can easily connect the Abandoned Cart Pro for WooCommerce plugin with Sendinblue to send your reminder emails!