We have covered all the tabs of Abandoned Cart Pro for WooCommerce plugin and detailed the information in various posts earlier. Today we will look into the main functionality of the updated version 4.3 which is to delete the unwanted abandoned carts from the list so that no abandoned cart email reminders are sent automatically.
This helps to maintain the abandoned cart list with all relevant entries and hence help to get straight hands on details that are required for evaluating the outcome.
The 3 main functions are as follows:
- Trash – Send the item to trash for deleting it. (Temporary deletion)
- Restore – Get the item back to the list from the trash. (Will only be activated if the item is sent to trash)
- Delete Permanently – The item in the trash will be deleted permanently and cannot be restored in the future.
Out of these, Trash and Restore update is visible and have an effect on following tabs of the plugin:
Dashboard – Campaign Stats
When trash functionality is used, the campaign stats that appear on the bottom of the dashboard has a change in their values. The % of Open Rate, Click Rate, and Recovery Rate changes depending on the email templates used for sending the reminder emails.
Product Reports Tab
If an abandoned order is moved from Abandoned Orders Tab to Trash then it will affect the ‘Number of Times Abandoned’ column under Product Report Tab. Whereas, when you move the Recovered order to the trash then it will affect the ‘Number of Times Recovered’ column under Product Report Tab. This implies that this tab gets affected by changes when items are moved to trash for both instances.
Now, let’s look into each functionality in detail with an example:
Trash Functionality
Trash will be visible under the Abandoned Orders Tab, only after cart gets abandoned as shown below:
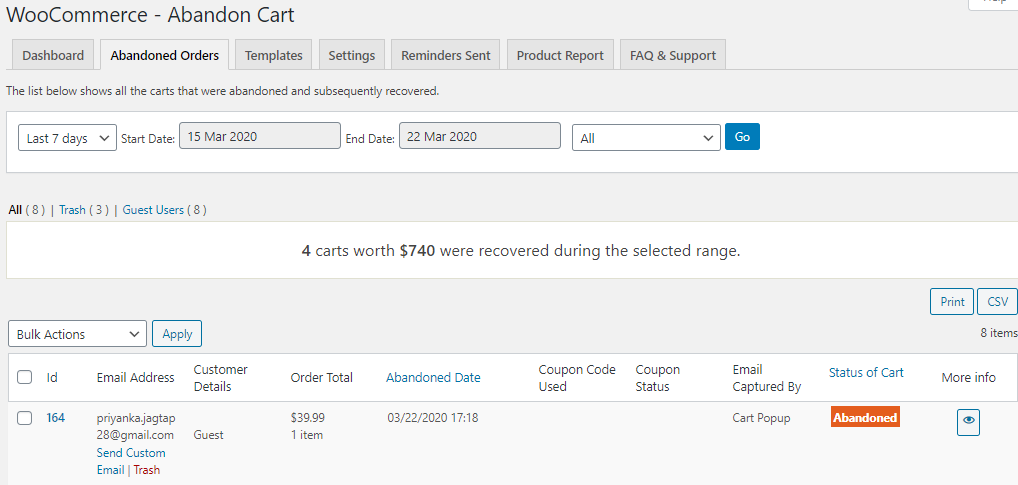
Trash option under Abandoned Orders tab
When you mouse hover the email address you will see the Trash option under Abandoned Orders tab.
You can find the Trash option under Recovered Orders also by mouse hovering the customer name as shown above.
Once you click on Trash in the above 2 tabs, that particular item is removed from the list and is sent to the Trash folder. Let’s look at the above 2 scenarios again by clicking on the Trash link.
Effect on Abandoned Orders tab
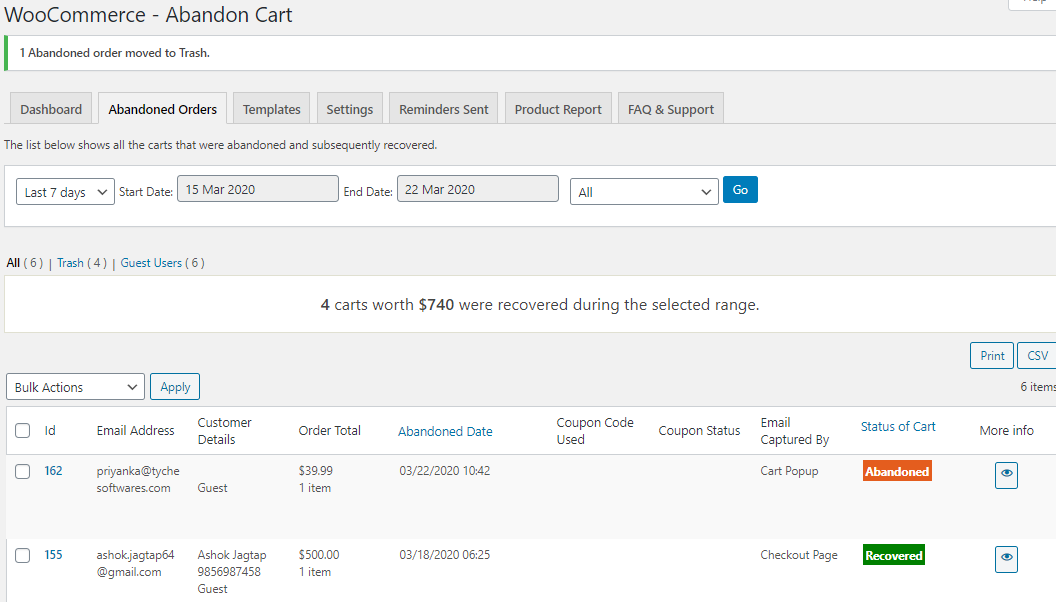
1 abandoned order moved to trash
The 1st entry of Order #164 which was abandoned on 22nd March 2020 has been moved to Trash and hence the item is removed from the list as shown above. This gets reflected on the Product Report Tab under the ‘Number of Times Abandoned’ column. The trashed order had item Ball Python Habitat which are abandoned 3 times in total before moving it to trash as displayed under Product Report tab:
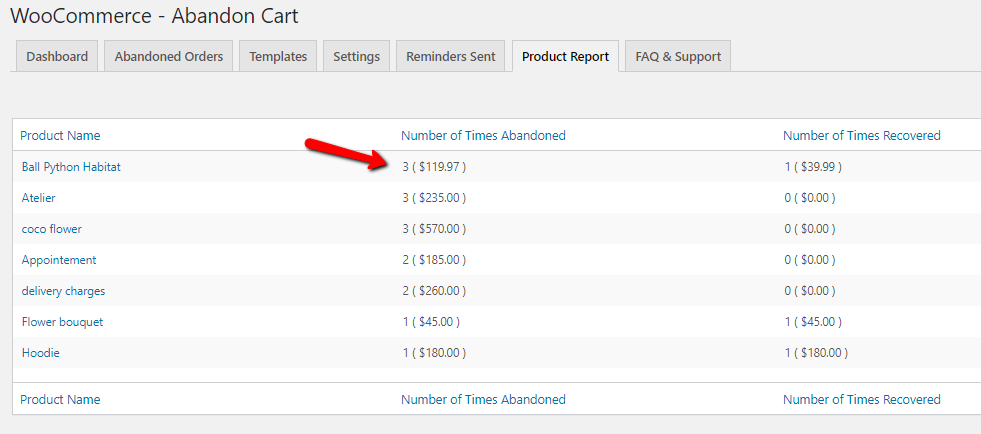
Ball Python Habitat was abandoned 3 items
The product Ball Python Habitat was abandoned 3 times in total as displayed under, ‘Number of Times Abandoned’ column. Hence it will show the count less by 1 for Ball Python Habitat product which is ‘2’ as shown below:
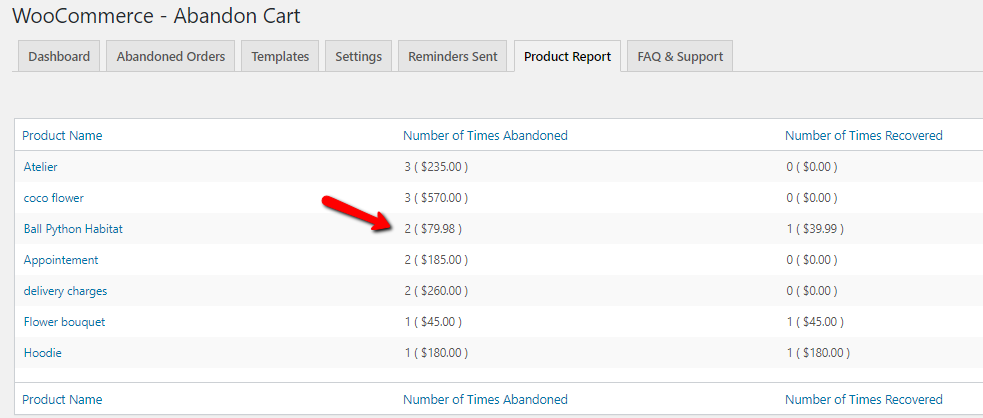
Number of Times Abandoned entry changed from 3 to 2
This means if any change takes place in the Abandoned Orders tab, then that gets reflected in the Product Reports tab.
Effect on Recovered Orders in the Abandoned Ordes tab
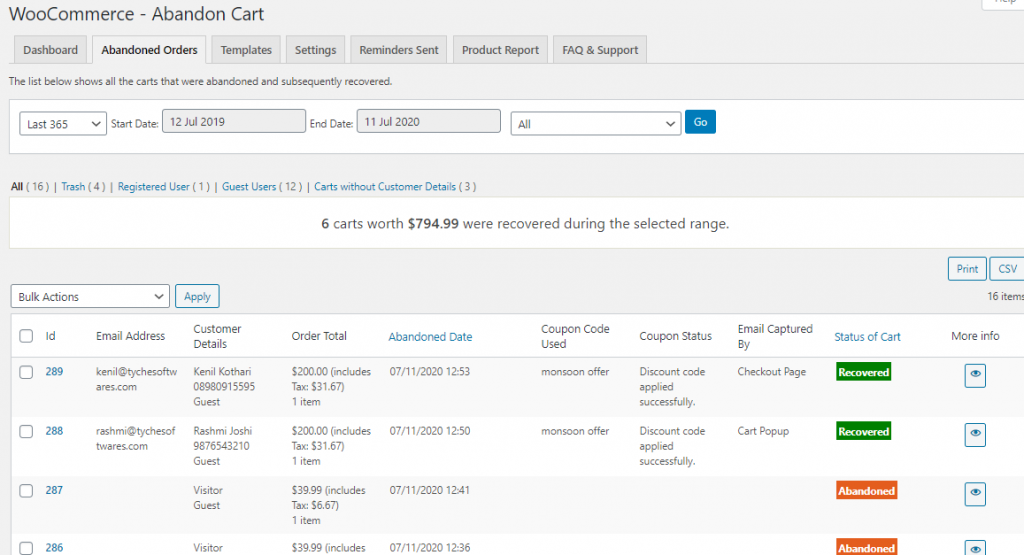
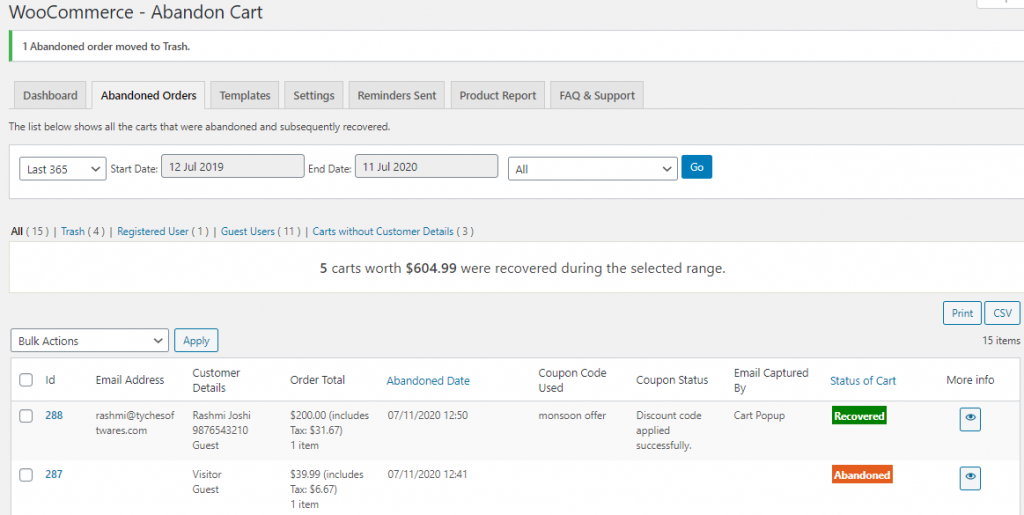
1 recovered order moved to trash
The first recovered order entry #289 in the list is moved to the trash folder. This can be done by clicking on the trash option which appears when we mouse hover on the customer name.
There is a change seen under the Product Report tab after performing this action. Before the recovered order was moved to the Trash folder, the product under that order which is Coco flower was recovered 2 times as shown below:
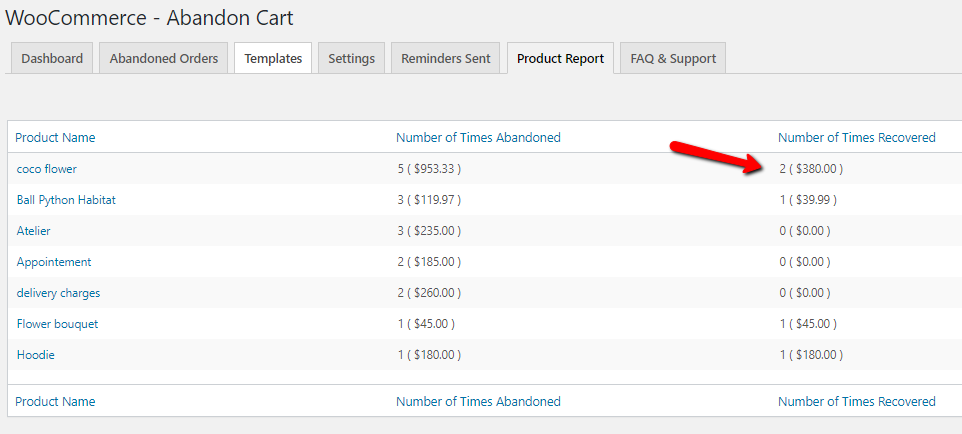
Coco flower was recovered 3 times
The above image shows Coco flower was recovered 2 times and the recovered revenue is $953.33 which is displayed under the ‘Number of Times Recovered’ column of the Product Report tab.
Now when the order is moved to trash, this will affect the ‘Number of Times Recovered’ column for Coco flower item as shown below:
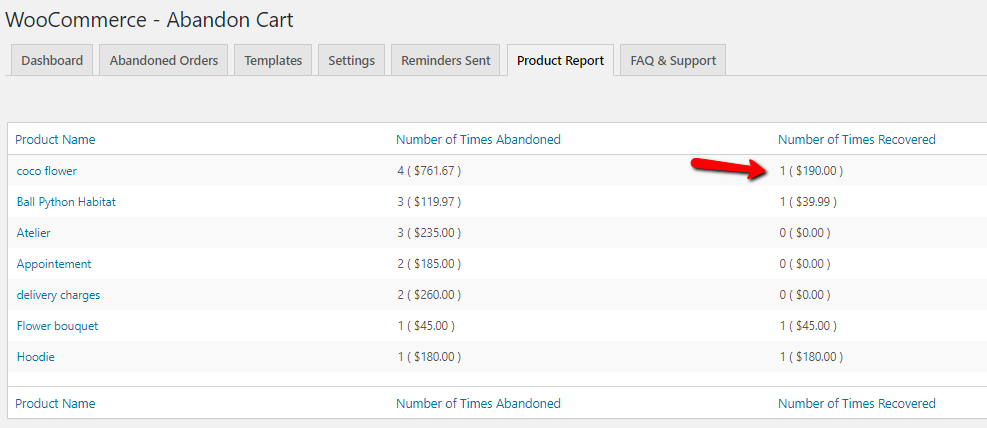
Coco flower is recovered 2 times
As you can see in the above image, the value has been changed from 2 times to recovered 1 time. This is because the recovered order for this item was moved to Trash, so the value is reduced by 1 under the ‘Number of Times Recovered’ column. This shows changes to one tab have a relevant effect on the other tab which helps in maintaining the same records throughout.
Restore & Delete Permanently functionality
When you move the items to Trash, you can also restore these items back to the list by clicking on the Restore link of the items in the Trash folder. Let’s look into this area for both the tabs that show items in Trash:
Abandoned Orders tab
Restore function:
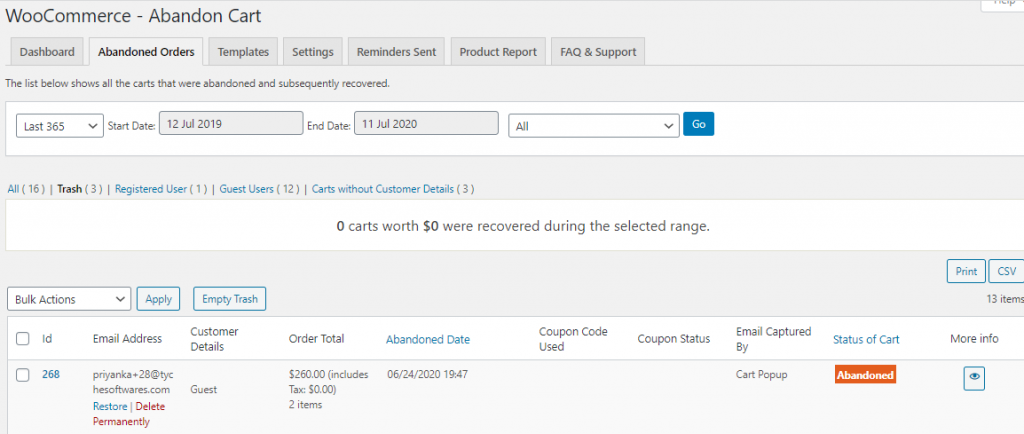 Restore and Delete Permanently option for abandoned order
As you can see, when you go to the Trash folder under Abandoned Orders tab and mouse hover on the trashed item, you will see 2 options Restore and Delete permanently. Here when you click on the Restore option, this item will be restored back to its original place which is back to the Abandoned Orders list. A message will be displayed confirming the item has been restored and that entry will no longer be seen under the Trash folder as shown below:
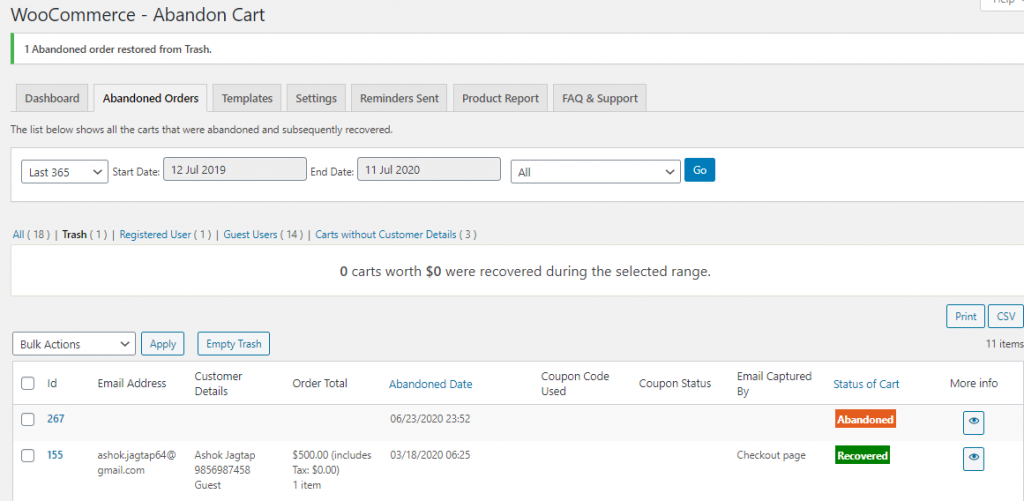
Trash item removed from Trash and restored back
Thus the item is restored back to the Abandoned Orders list as shown below:

Restored item displayed back under Abandoned Orders list
Delete Permanently function:
Now if you click on Delete Permanently function instead of Restore, this item will be deleted permanently and will not be seen under Abandoned Orders list or Trash folder.
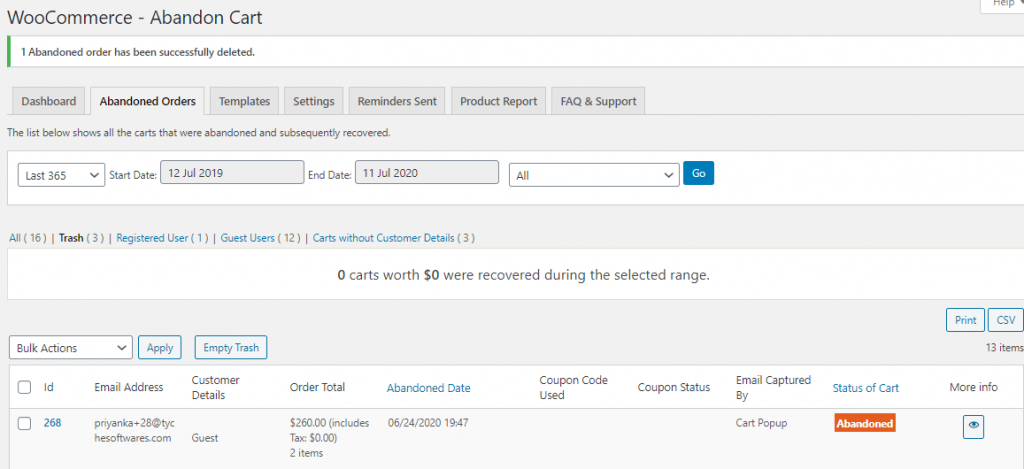
1 abandoned order was deleted permanently
This shows the 1st entry in the Trash folder was deleted permanently. There is a message displayed once the order is successfully deleted.
Recovered Orders
Restore function:
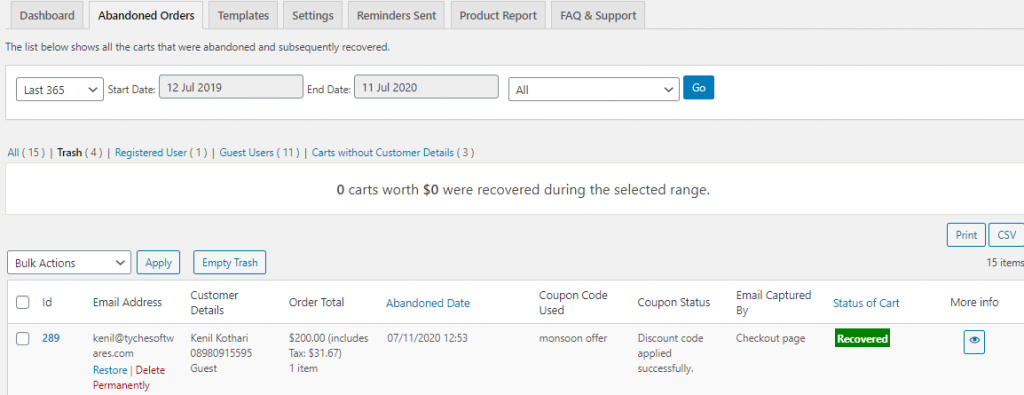
Restore and Delete Permanently options for Trashed item
As you can see, there is one recovered item that was trashed. Now if you want to restore this item back to its original place under Abandoned Orders list, simply mouse over the customer name and click on the Restore option. This will restore 1 recovered order leaving no entries in the Trash folder and a message will be displayed as shown below:
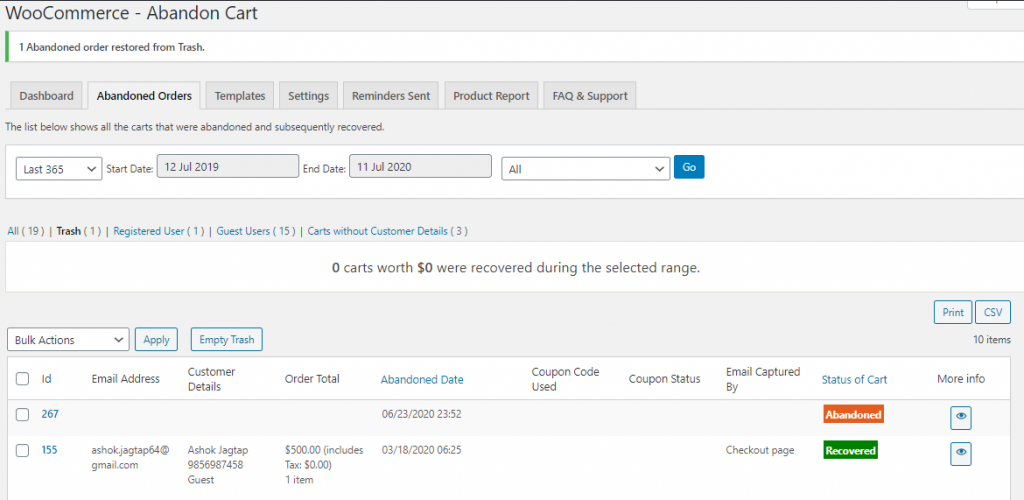
1 Recovered order restored from Trash
Thus the item is restored from the Trash folder to the Abandoned Orders list as shown below:
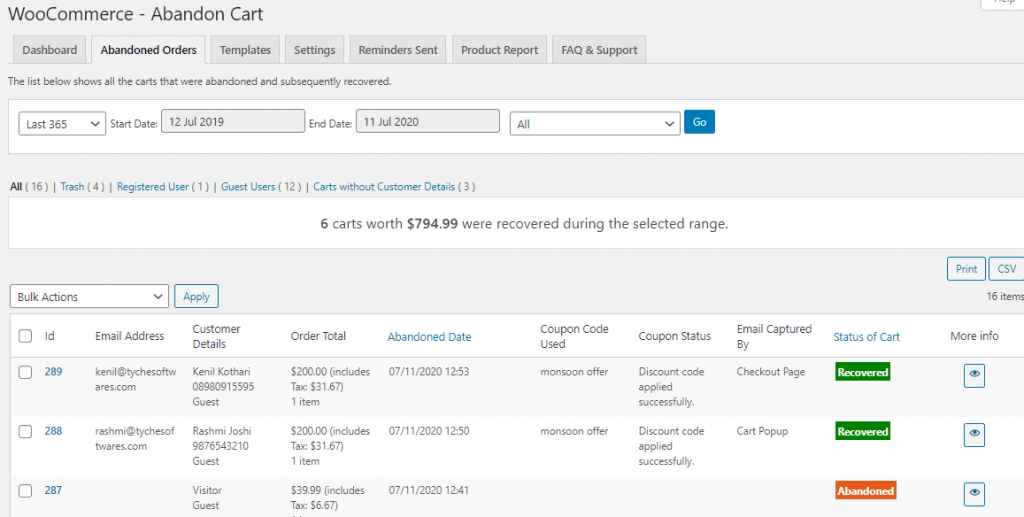
Item restored to the Abandoned Orders list
Delete Permanently function:
If you click on the Delete Permanently function, then the order which is under Trash folder will be deleted permanently and will not be available under Abandoned Orders tab or Trash folder as shown below:
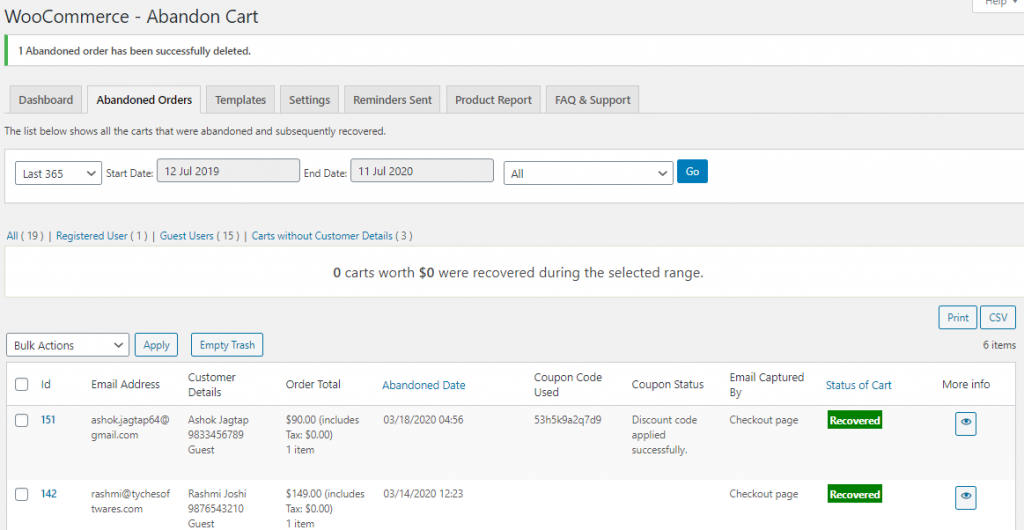
One recovered order was deleted permanently
This shows the recovered order which was trashed has been successfully deleted and a message for the same is displayed as shown above.
Thus you can perform any action like restore the order or delete it permanently as per the requirements. If you feel that the item will no longer give any stats and can be deleted forever, then you click on Delete Permanently option otherwise click Restore to get that item back into the list.
Effect on the Dashboard
The actions that you perform has a direct effect on the Dashboard. Below are the stats on the Dashboard for Abandoned Carts before the order was moved to Trash:
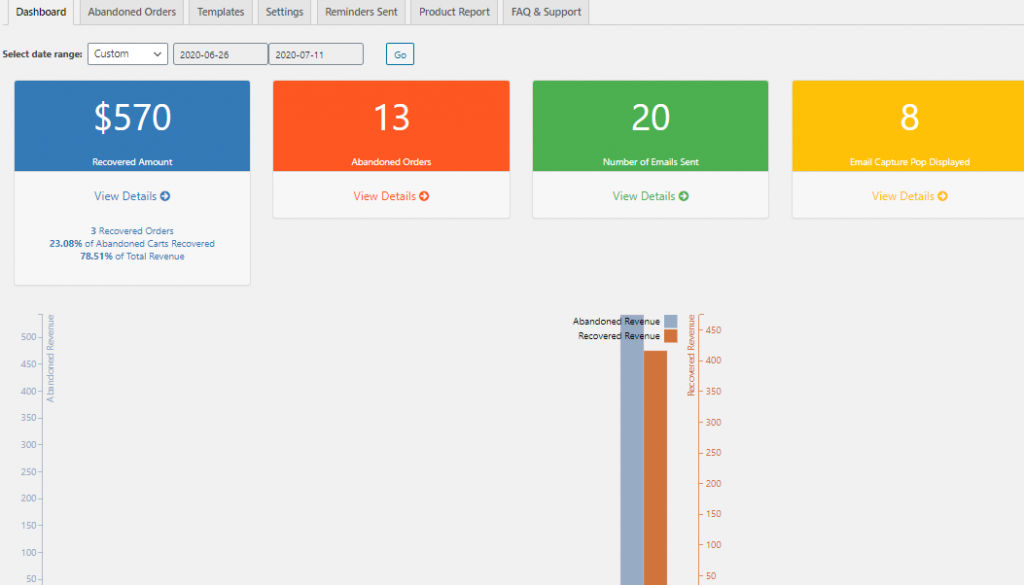
Stats before the order was moved to trash
As you can see, there were 13 abandoned Orders before the order is moved to the Trash folder. After you move 1 order to Trash, the result will change as shown below:
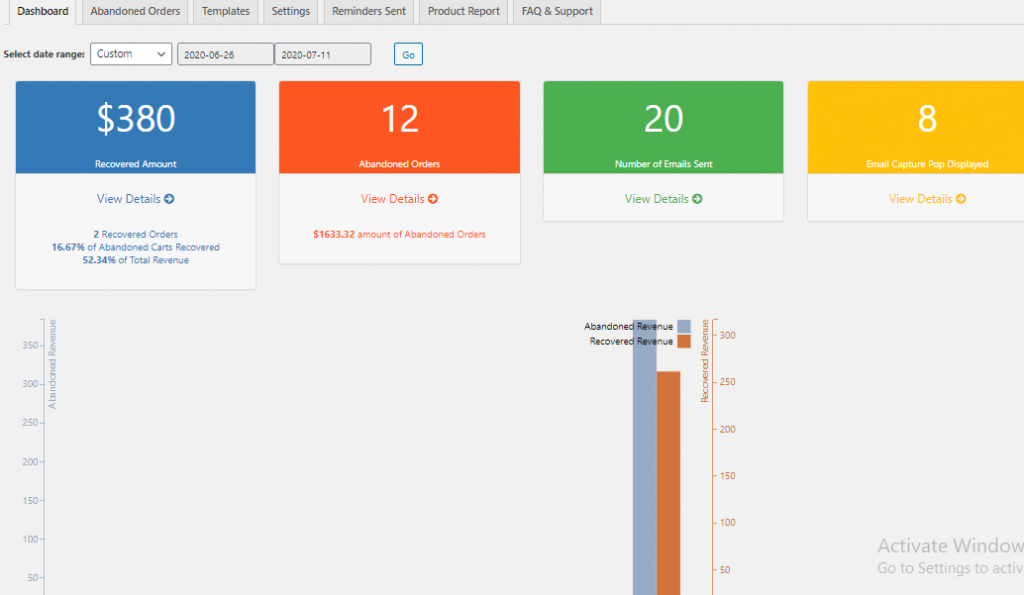
Abandoned Orders was reduced by 1
This shows that the Abandoned Orders were reduced by 1 order after the order was moved to Trash. Hence the total number of abandoned orders is showing 12 instead of 13 now.
Similarly, the same effect will take place for Recovered orders on the Dashboard. Hence this helps you to keep your data up-to-date and you can understand the statistics very easily just at a glance.
Bulk Action
You have a provision to perform bulk action while using Trash and Restore from the dropdown as shown below. This is available under both the tabs and the same action needs to be performed:
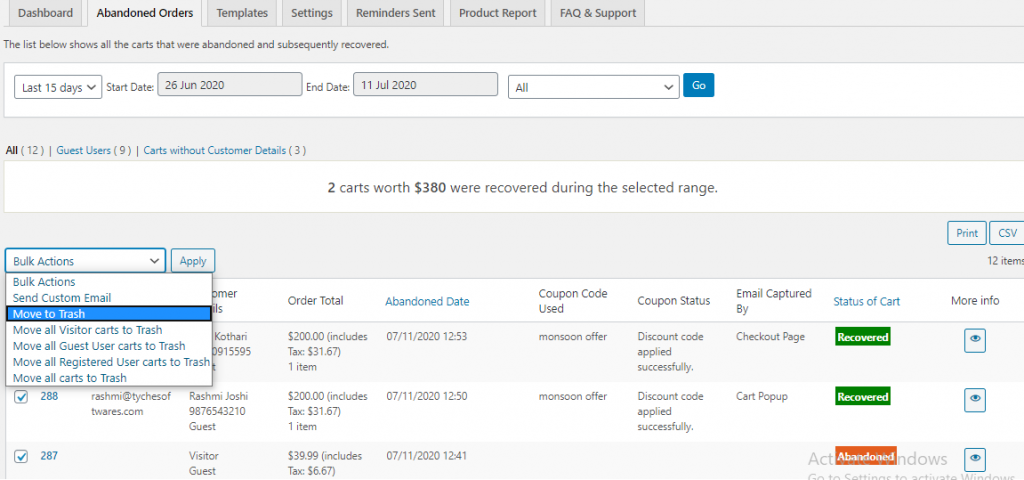
Bulk Action for Move to Trash function
You need to select the number of items from the list that you want to move to Trash. Once you have ticked the necessary checkbox, you simply click on Bulk Action and from the dropdown select ‘Move to Trash’ option and click on the “Apply” button as shown above. This removes all selected items from the list and sends it to Trash in one click.
Similarly, you can perform Bulk Actions for restoring multiple items in one click.
Conclusion
This update which helps to delete unwanted entries makes the task for the merchant very easy and convenient to simply eradicate the irrelevant stuff from the list. This, in turn, will help you to keep data up-to-date automatically. It’s a great move towards enhancing the experience and increase the use of Abandon Cart Pro for WooCommerce plugin.
So come let’s check the new update now!!!