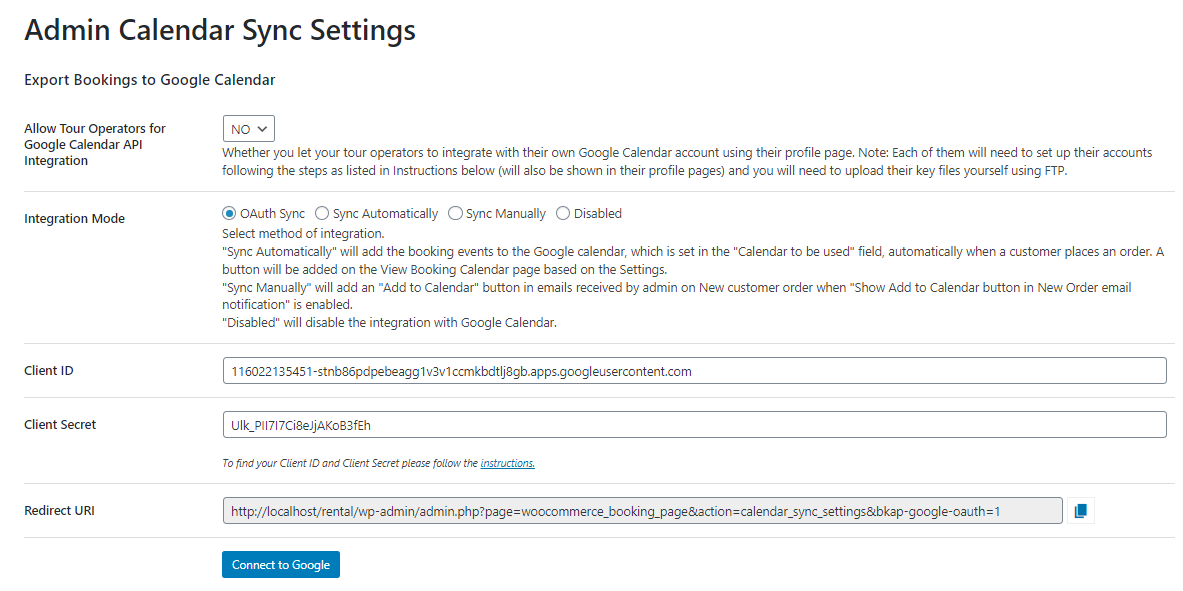
Booking & Appointment Plugin for WooCommerce allows integration with Google Calendar via OAuth. Please refer the below steps for integrating via OAuth
- Go to the Google Developers Console and select a project, or create a new one.

2. Give the Project name and click on the Create button.

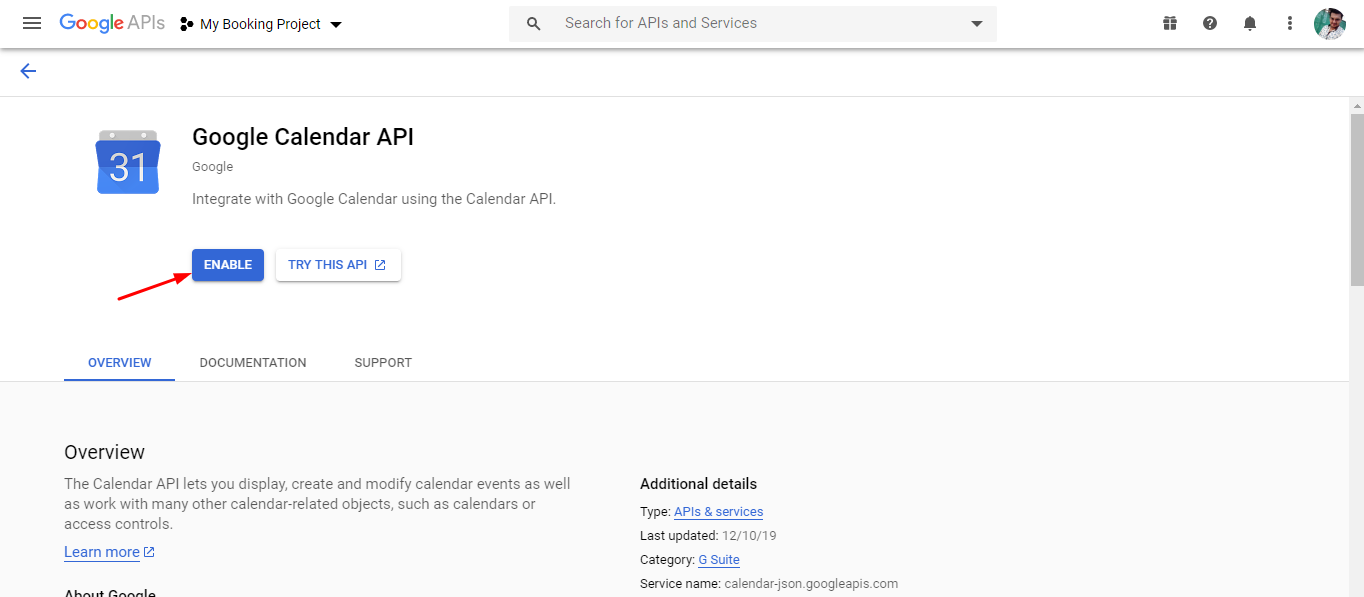
3. Once the project is created, the Calendar API needs to be enabled. To do so, click on ENABLE API AND SERVICES link and search for Google Calendar API, and enable it by clicking the ENABLE button.
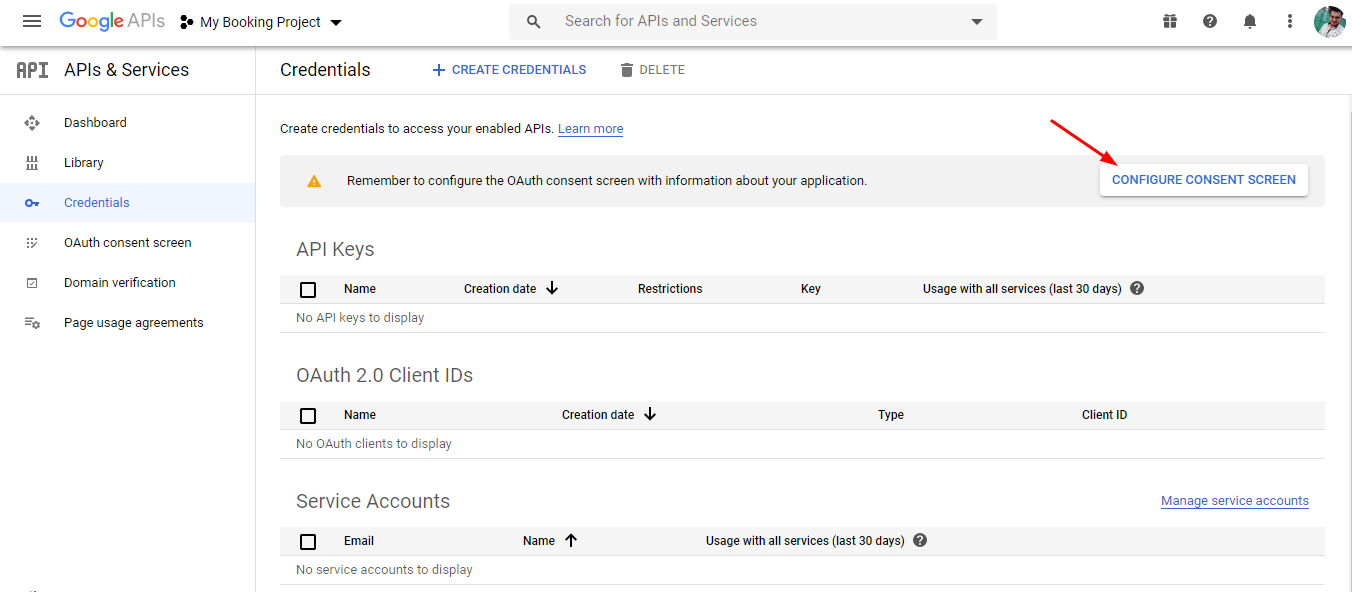
4. On the left, click Credentials. If this is your first time creating a client ID, you’ll be prompted to configure the consent screen. Click Configure consent screen.
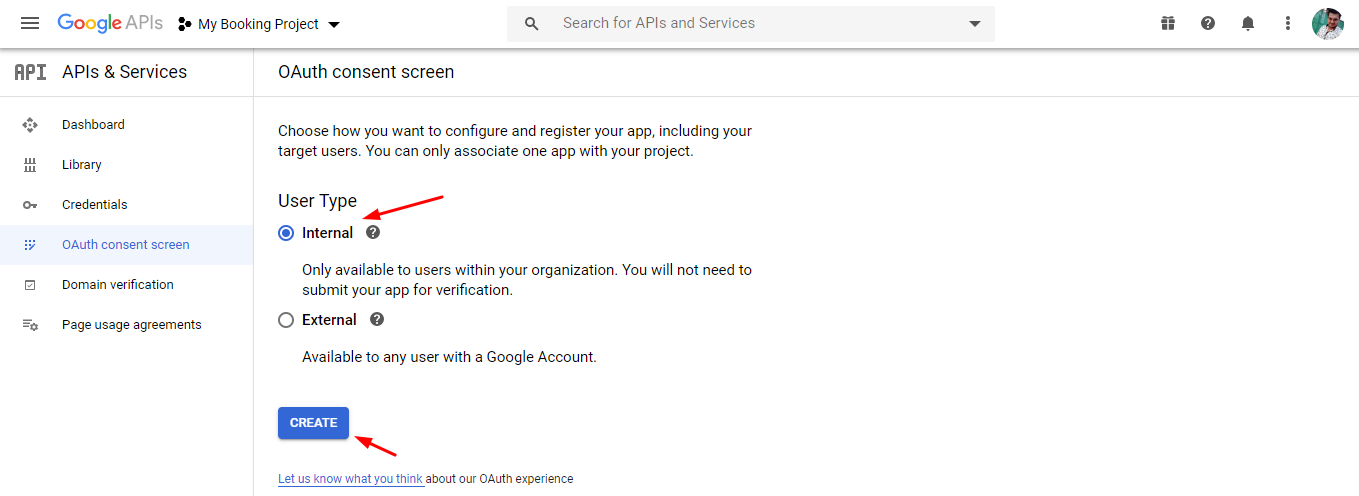
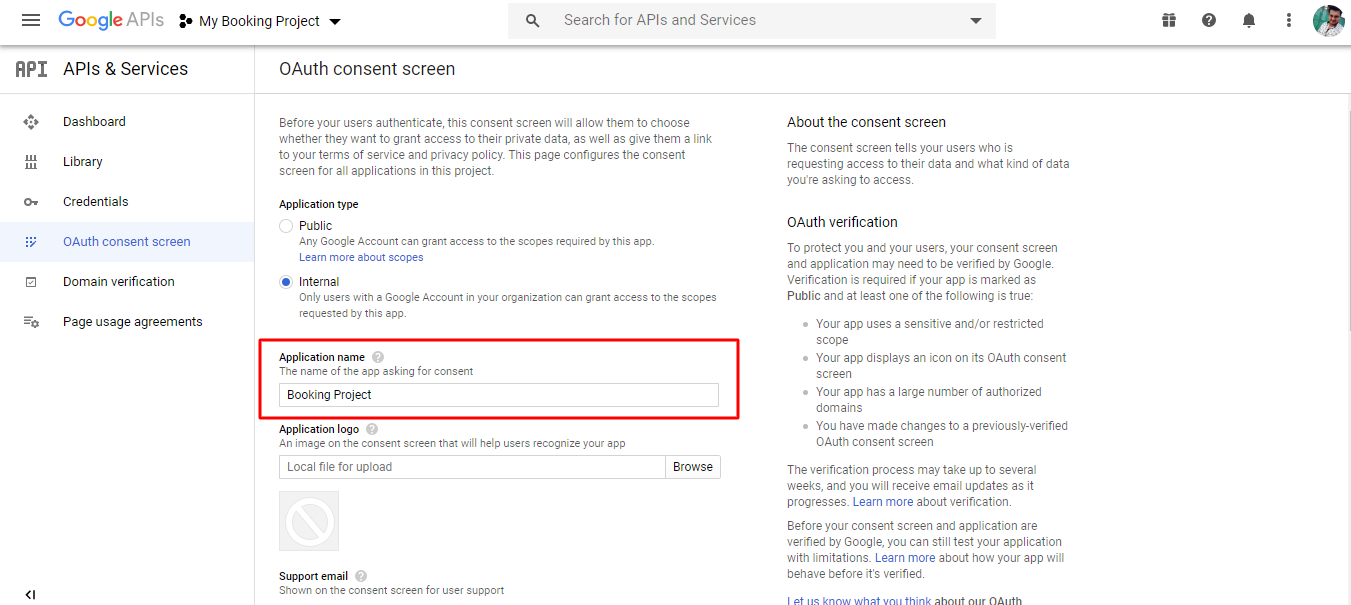
5. Go to the OAuth consent screen. Select User Type and click on the CREATE button.
6. Set the Application name and click on the Create button.
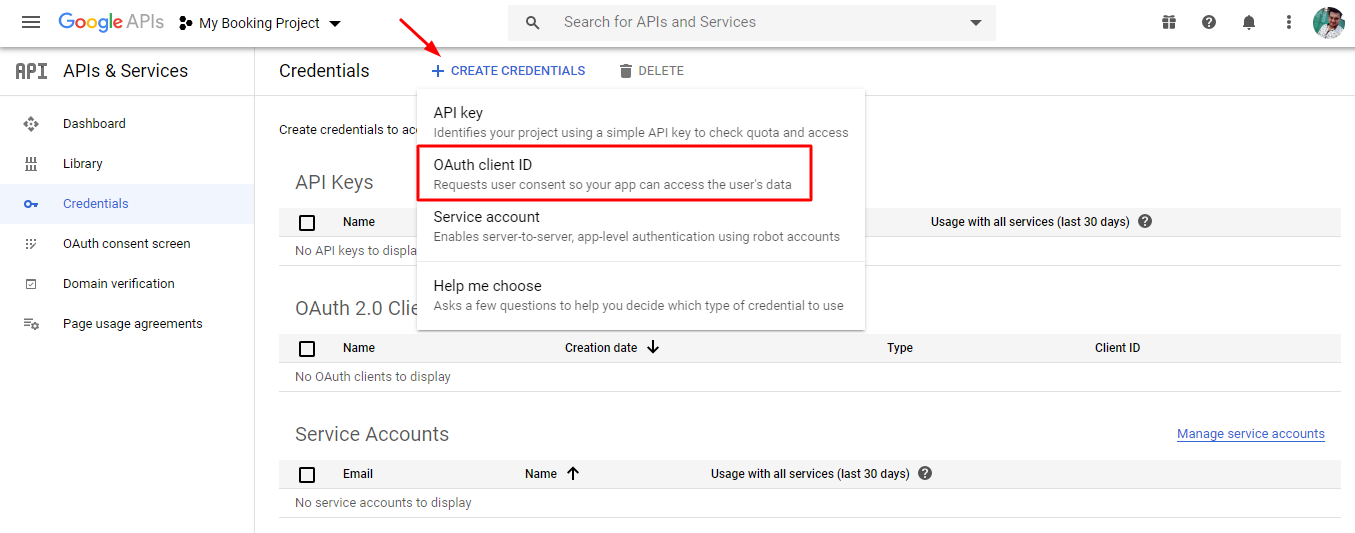
7. Go back to the Credentials tab, click Create credentials, then select OAuth client ID.
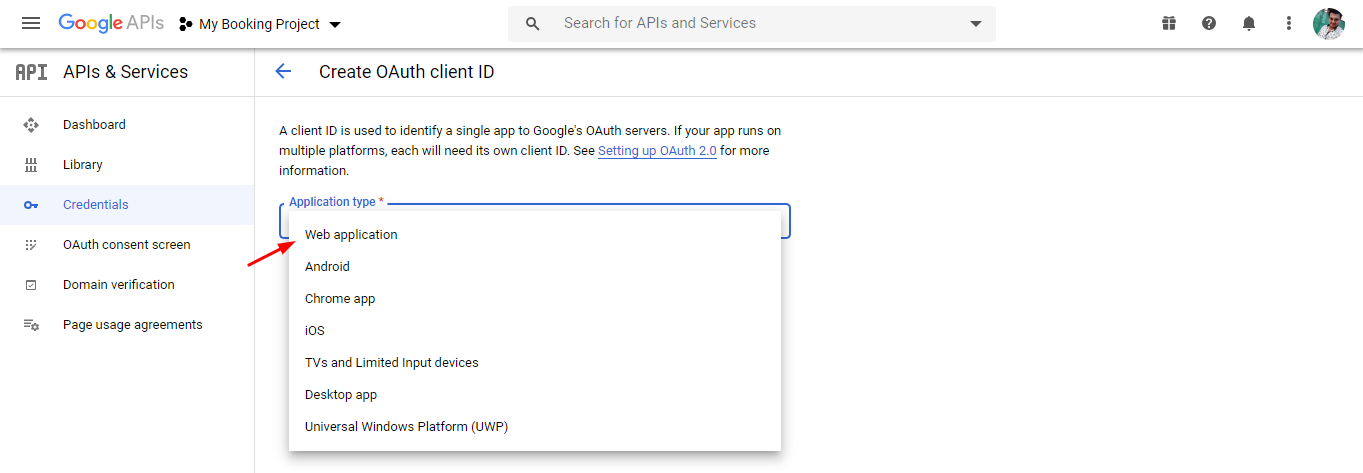
8. Select Web application under Application type and provide the necessary information to create your project’s credentials.
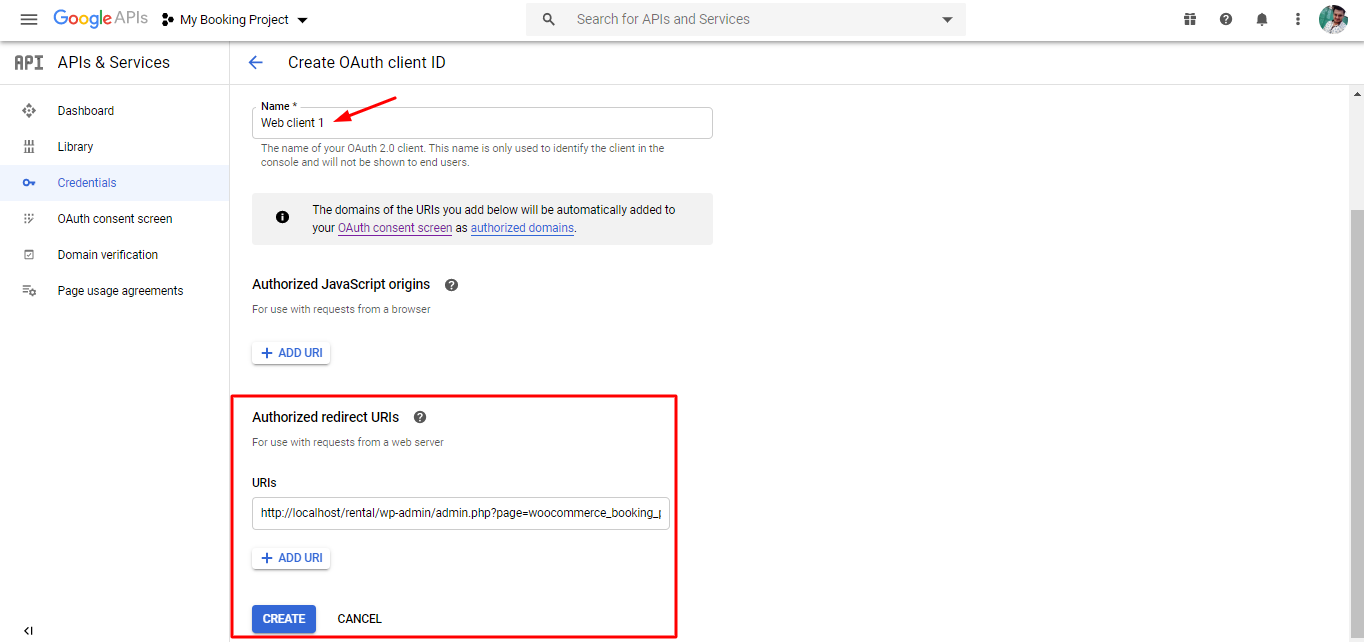
9. For Authorized redirect URIs enter the Redirect URI and then click Create.
- If you are setting up at global level then you have to use REdirect URI available on Booking-> Settings-> Google Calendar Sync )
- If you are setting up at product level then you have to use Redirect URI available on Edit Product-> Booking Meta box-> Google Calendar Sync tab.
10. On the dialog that appears, you’ll see your client ID and client secret.
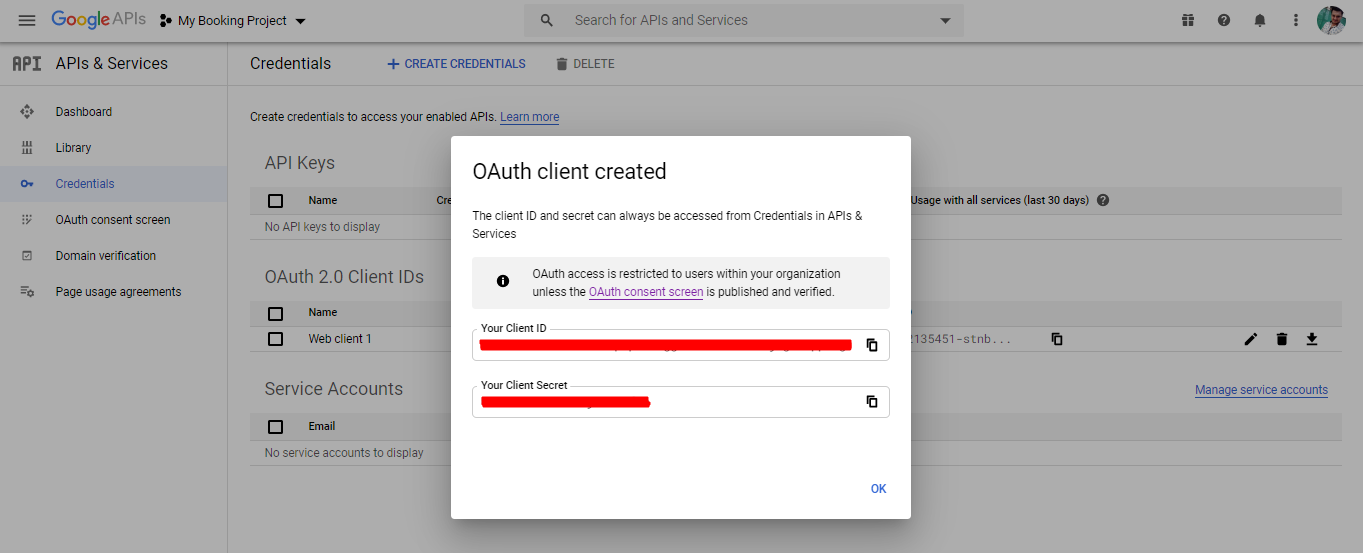
11. Use them in Client ID and Client Secret fields that can be found under the Booking-> Settings-> Google Calendar Sync-> Admin Calendar Sync Setting section. Once entered the information then Click the Save Settings button.
