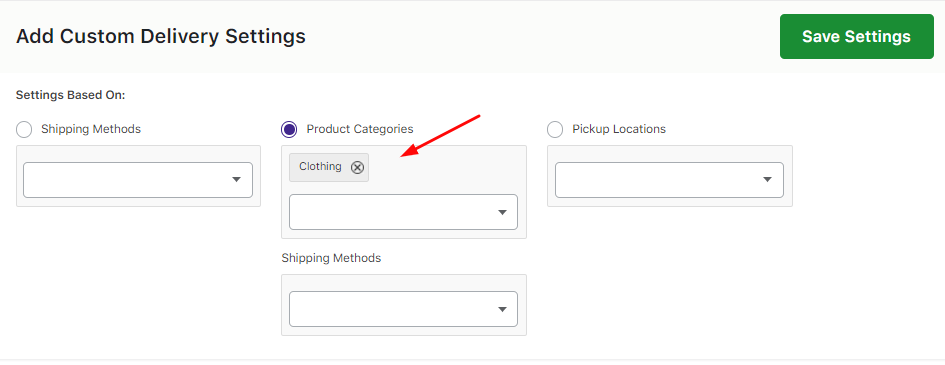
Creating custom delivery schedules based on different Product Categories is as easy as 1-2-3 with Order Delivery Date Pro for WooCommerce plugin. Here’s how you can create them:
Go to Order Delivery Date -> Settings -> Delivery Schedule.

Scroll down to find ‘Add a custom delivery schedule’. Click on it.

Choose the ‘Product Categories’ option and select the categories you wish to add.

We’ll go with the Product Category ‘Clothing’ from the dropdown. You can choose multiple Product Categories if you wish.
Following this, use the different dropdowns such as Date, Time, Holiday Settings, etc to enter all your delivery requirements.
Once you’ve filled that and clicked on ‘Save Settings’, all the data will appear like this:

You can use the toggle to enable or disable this custom delivery schedule. In the right-hand top corner, you would find 3 icons. You can use the Pencil icon to edit any aspect of the delivery schedule. You can use the Duplicate icon to create an identical delivery schedule. Lastly, you can use the Trash icon to delete this schedule.
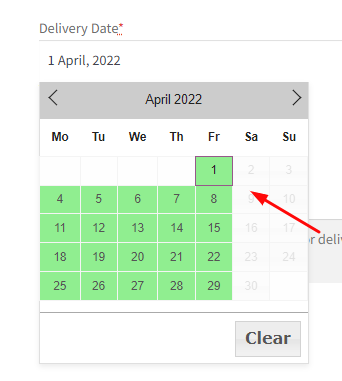
As per the settings added for the product category of the product that was added to the cart, the delivery date and time will be enabled on the Checkout page. In this instance, for product ‘Scarf’, the delivery is enabled for Monday, Tuesday, Wednesday, Thursday, and Friday as shown in the above image. Hence this will reflect on the calendar of Checkout page as shown below:

A FEW THINGS TO KEEP IN MIND:
1. If there are multiple products selected in the cart and the minimum delivery time for each are set as different, then the settings of the product whose minimum delivery time is higher will be considered.
For example, let’s say that a customer has added 2 products in the cart:
Product 1: Minimum delivery time – 24 hours. Product Category settings: Monday, Tuesday and Wednesday delivery days.
Product 2: Minimum delivery time – 36 hours. Product Category settings: Thursday and Friday delivery days.
The delivery calendar on the checkout page will show all the dates of Thursday and Friday enabled while the rest would be disabled, thus giving priority to the settings of Product 2.
2. When there are multiple products added to the cart then common delivery settings will get applied.
This means if Product Category 1 is added in the cart with delivery days selected as Monday, Tuesday, & Wednesday while Product Category 2 has delivery days as Wednesdays & Saturdays, then the calendar on the checkout page will show only Wednesdays enabled for delivery.
3. When you add multiple products in the cart where some have a product category assigned while others don’t, then the settings of the product whose category is defined will be taken into consideration.
So for instance, Product 1 has category assigned but no category is assigned for Product 2. The settings of Product 1 will be considered and accordingly delivery days will be enabled on the calendar of checkout page.
4. When settings for shipping methods as well as product categories are added in the Custom Delivery Schedule, then the priority will be given to the settings of shipping methods.
5. When the settings for both shipping methods and product categories are added in the Custom Delivery schedule, and if any shipping method is selected which does not have Settings added for it, then the default Settings will be displayed in the delivery calendar.
So there you have it. Keep these things in mind and start creating your personalized delivery schedules today!