Sometimes, for various reasons, you may want to rename order status messages in WooCommerce for your customers, or even for your store administrators. This could be for various reasons e.g. because you want the tone or language of your WooCommerce order status messages to be consistent with that of the rest of your store, to maintain exclusivity, or to offer a personalised touch to the orders placed by your customers or even to make it easier for your shop managers to understand what the status means. Let’s dive into this post to see how to rename order status messages in WooCommerce.
Default Woocommerce Order Status Messages
By default, WooCommerce order status messages look like this:
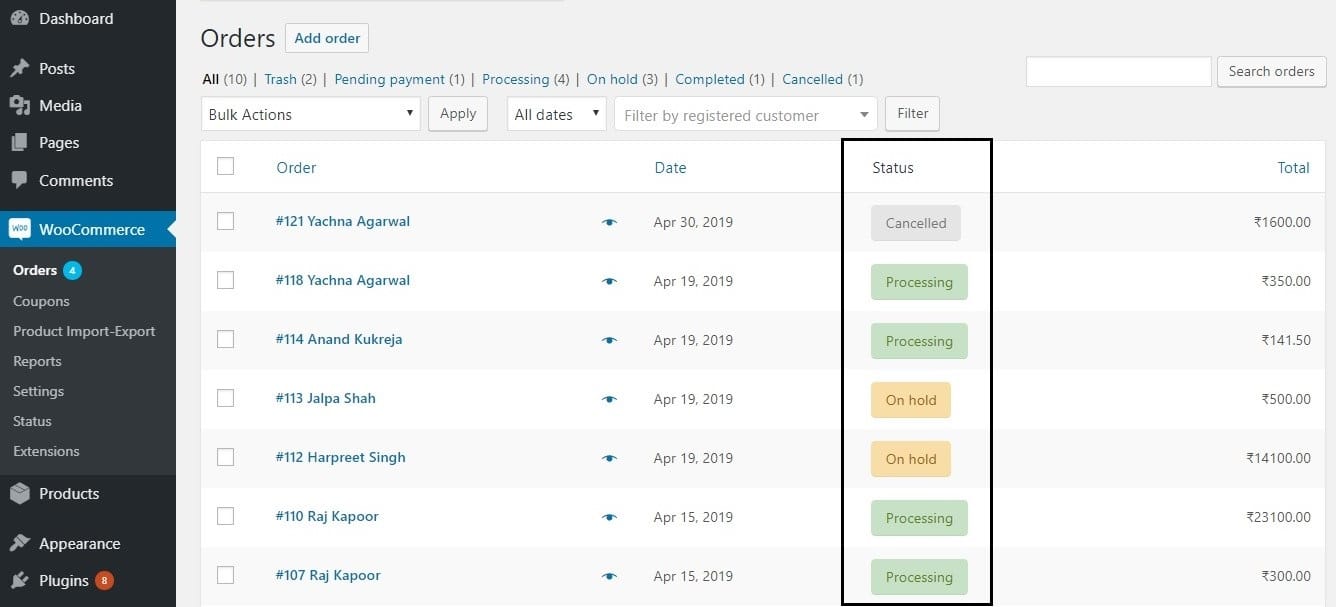
These messages also get displayed on the front-end whenever a customer tries to place an order. We can use a simple code snippet to use custom messages in place of these.
Steps to Renaming the Order Status Messages in WooCommerce
Here are the steps you need to follow in order to rename the default order status messages in WooCommerce:
- First, create a child theme for your WordPress installation
- From the Dashboard menu, under the Appearance Menu go to Theme Editor Menu.
- Look for the theme functions.php file. This is where we will add the code snippets that will rename the order status messages in your WooCommerce store.
- Now insert the following code in the functions.php file of your child theme:
add_filter( 'wc_order_statuses', 'ts_rename_order_status_msg', 20, 1 );
function ts_rename_order_status_msg( $order_statuses ) {
    $order_statuses['wc-completed']  = _x( 'Order Received', 'Order status', 'woocommerce' );
    $order_statuses['wc-processing'] = _x( 'Your Order is being processed', 'Order status', 'woocommerce' );
    $order_statuses['wc-on-hold']    = _x( 'Your Order is on hold', 'Order status', 'woocommerce' );
    $order_statuses['wc-pending']    = _x( 'Your Order is pending', 'Order status', 'woocommerce' );

    return $order_statuses;
}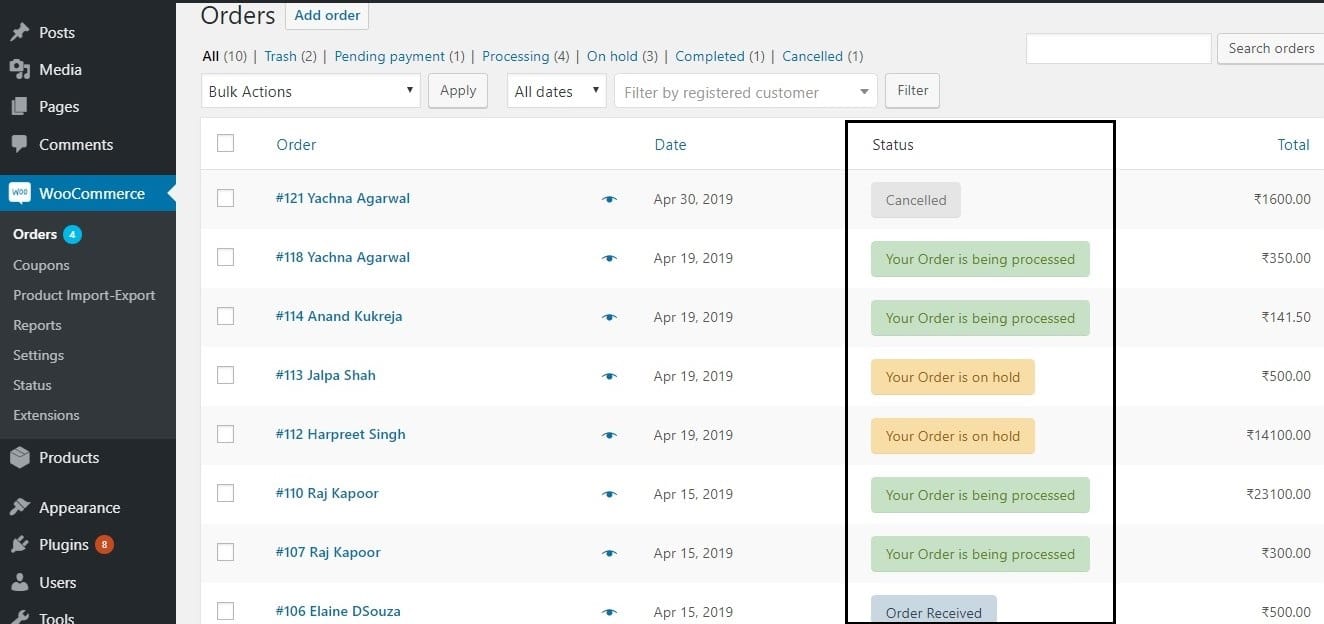
You will see that the order status has changed. We used the hook wc_order_statuses here and attached our function ts_rename_order_status_msg to it. The $order_statuses array that we passed as the argument contains the status messages as its first value.
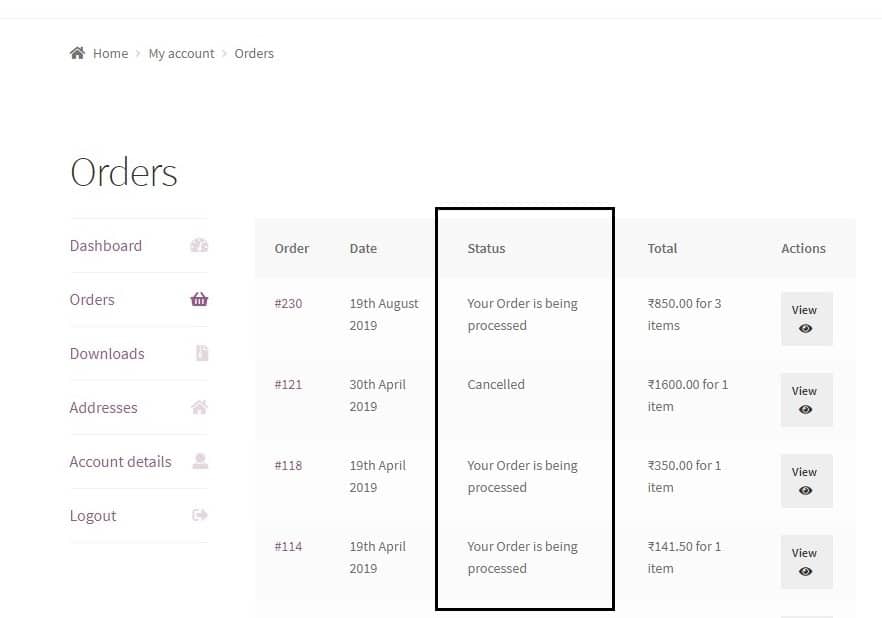
The status messages also change in the front-end, where you check your order status under My account->Orders:
There are two other places though where the Woocommerce order status message gets displayed i.e. in the top menu inside the Admin Dashboard, and also in the dropdown for Bulk Actions:
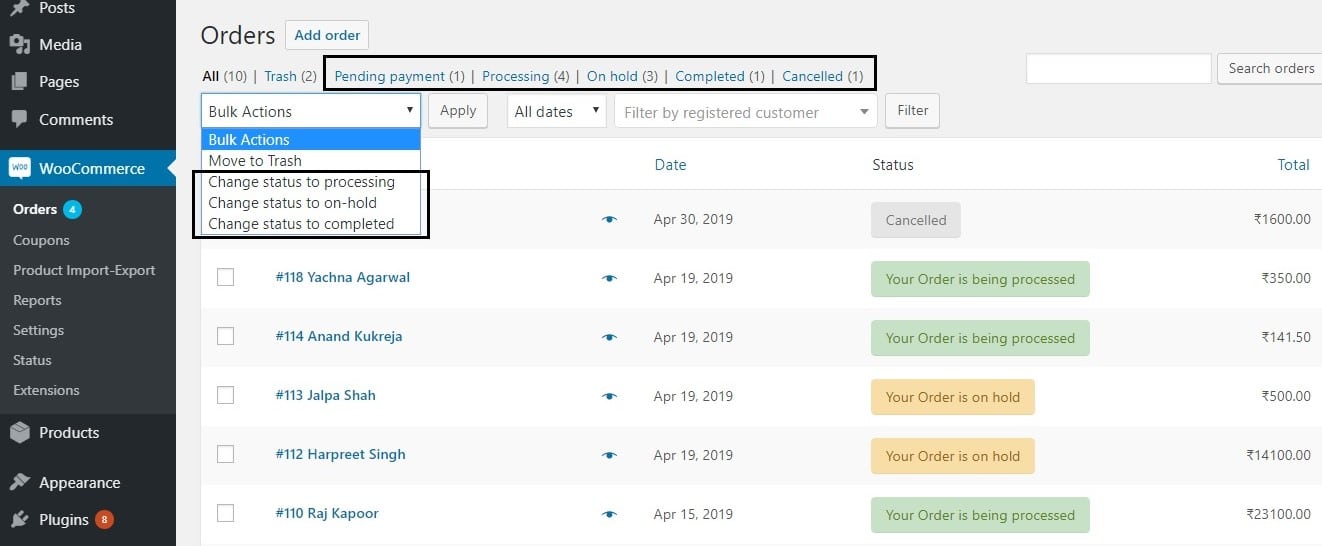
These status messages can be changed too using two other hooks to which we will attach two other functions.
Add the below code to the functions.php file of your child theme to change the status message in the top menu:
foreach( array( 'post', 'shop_order' ) as $hook )
    add_filter( "views_edit-shop_order", 'ts_order_status_top_changed' );

function ts_order_status_top_changed( $views ){
    if( isset( $views['wc-completed'] ) )
        $views['wc-completed'] = str_replace( 'Completed', __( 'Order Received', 'woocommerce'), $views['wc-completed'] );

    if( isset( $views['wc-processing'] ) )
        $views['wc-processing'] = str_replace( 'Processing', __( 'In Process', 'woocommerce'), $views['wc-processing'] );

    if( isset( $views['wc-on-hold'] ) )
        $views['wc-on-hold'] = str_replace( 'On hold', __( 'Order on Hold', 'woocommerce'), $views['wc-on-hold'] );

    if( isset( $views['wc-pending'] ) )
        $views['wc-pending'] = str_replace( 'Pending payment', __( 'Payment Pending', 'woocommerce'), $views['wc-pending'] );

        return $views;
}
You can see that we have used views_edit-shop_order hook here to simply replace the String values that each array key (for different order status messages) contains.
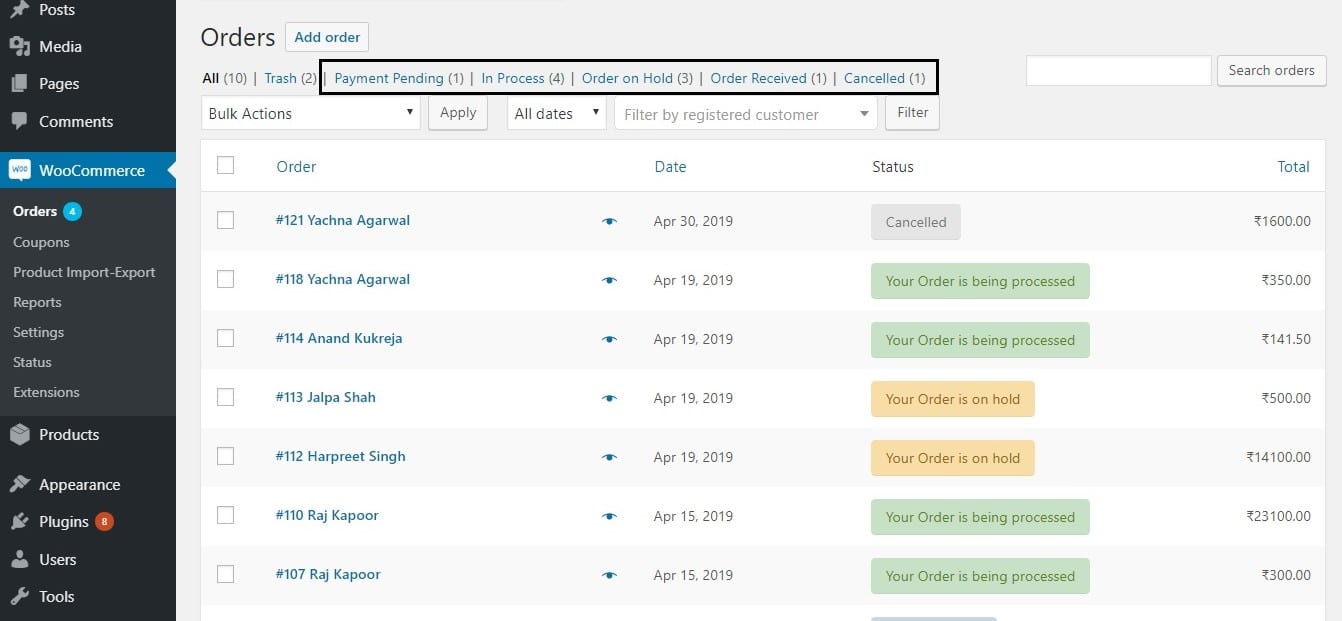
Now, the last place that we have to change the order status messages (if necessary) is the Bulk Actions dropdown that we highlighted above. For this, we will use yet another code snippet and add it to the same functions.php file:
add_filter( 'bulk_actions-edit-shop_order', 'ts_bulk_actions_order_status', 20, 1 );

function ts_bulk_actions_order_status( $actions ) {
    $actions['mark_processing'] = __( 'Mark as In Process', 'woocommerce' );
    $actions['mark_on-hold']    = __( 'Mark as Order on Hold', 'woocommerce' );
    $actions['mark_completed']  = __( 'Mark as Order Received', 'woocommerce' );

    return $actions;
}
Here, the bulk_actions-edit-shop_order hook is being used to change the values of the different actions that are applied to orders.
You can see that the order status messages will have changed in this dropdown:
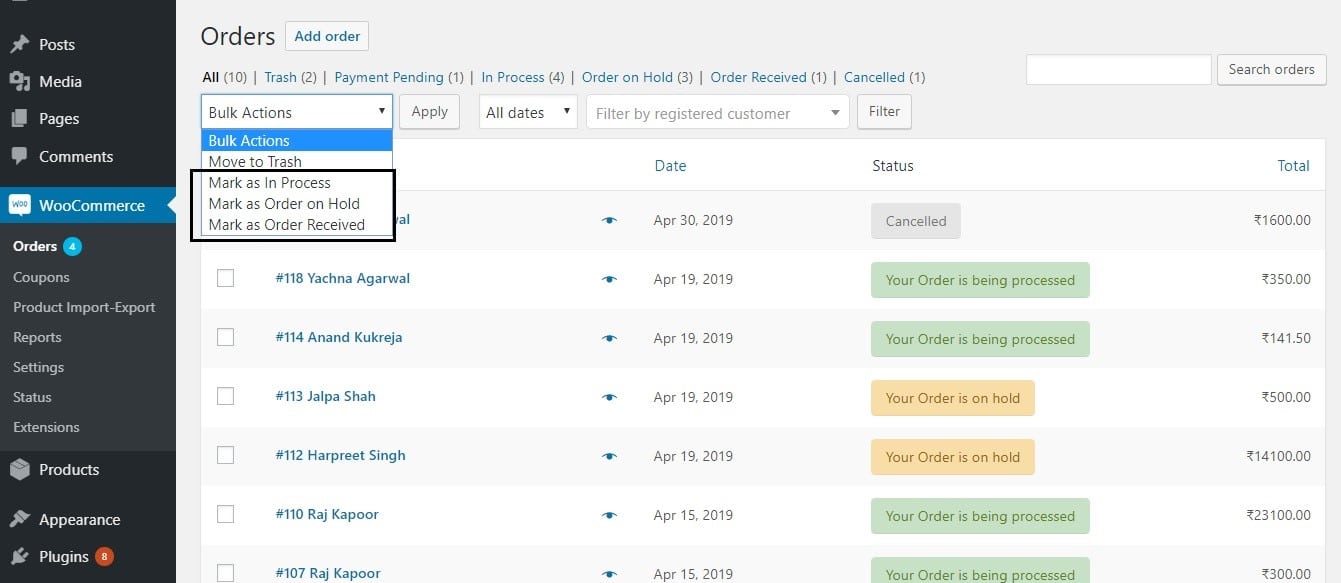
In this manner, you can change the order status messages at all places depending on your preference.
While these code snippets will help you change the order status messages, if you want to add a custom order status instead or even send custom emails to your customers based on these order status messages, you can use our plugin Custom Order Status as a WooCommerce order status control plugin for your online store.
To learn about how to automatically complete Woocommerce orders when they go to processing status, Check out this post.


Code to change status message in the top menu doesn’t work for me!
Sorry to hear that. We just tested it in 2023 on WordPress 6.2.2 and WooCommerce 7.8 with the Storefront theme enabled and it still works. Sometimes, a code snippet may not work due to a theme or plugin installed that may be clashing with its behaviour. One way to debug this in case of plugins is to disable all plugins & enable them one by one, to detect which plugin may be causing it. If it still doesn’t work, then it can be an issue with the theme.
Very useful article, i just tried to change the status of my orders and i have done successfully.
Thanks alot author.
You’re welcome!
works simply as needed, thank you!!!
Most welcome!
This is great, but, we need to show a different status string on the front-end to back-end. Is this possible?
Yes, absolutely. Just use the condition if (is_admin()) and enter the code snippet inside this condition for the backend status messages. In the else loop, the same code snippet can be used– this will work for frontend status messages.
Very practical! Bookmarked!
Thank you! 🙂
Glad you found it useful.