This post discusses on how to turn your WooCommerce store into a booking platform with the WooCommerce Booking & Appointment Plugin. Whether you are selling services, concert tickets, scheduling meetings, taking appointments, selling vacation rentals or providing hotel bookings – the plugin caters to a large audience that intend to use WordPress & WooCommerce for bookings.
The bookings are largely categorized into 3 types:
1. Only date bookings
2. Date & time based bookings
3. Multiple day bookings
We will focus this topic on how to setup a Date & time based booking with WooCommerce. This includes cases like taking an appointment, scheduling a conference call, booking a time-based tour activity and other similar bookings.
If you want to skip this post & go directly to the user experience on the Frontend for date & time bookings with WooCommerce, please go to Part 2.
The first step would be to make sure that you have the WooCommerce Booking & Appointment Plugin installed & activated. You also need an active license key in order to receive updates & support from the Tyche team.
Setting up
The Booking settings have to be configured at the product level. There are a few global settings available as well under the Booking menu in admin.
I will create a WooCommerce product that will allow me to schedule conference calls with users for a fee. It allows me to sell my time.
Products can be created by clicking on Products -> Add Product link from the left menu.
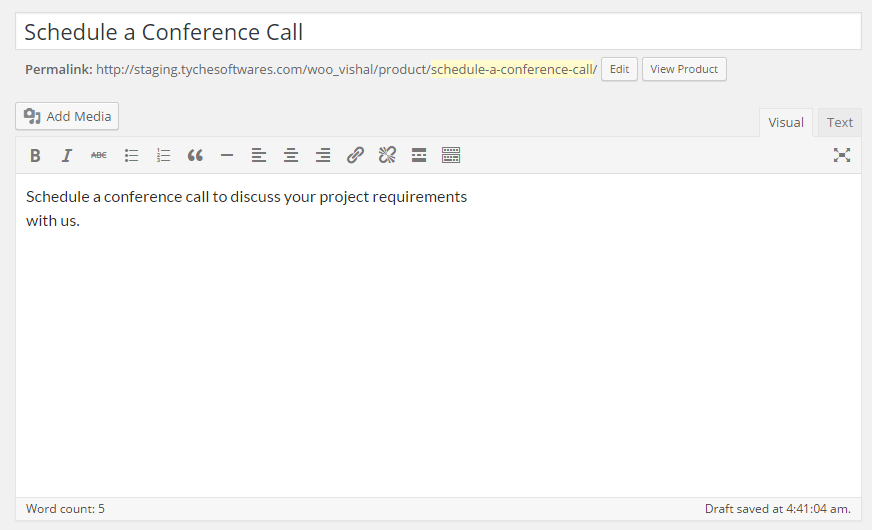
Step 1: General Product Settings – Enter Product Title, Description & give it a price

Step 2: Booking Settings for WooCommerce Bookable product
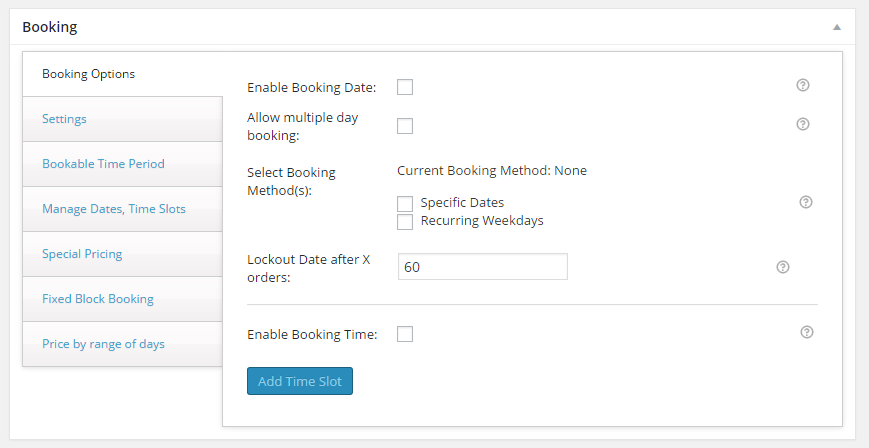
This is how the Booking meta box looks by default when no settings have been created.
Step 3: Setup booking days / booking dates for WooCommerce Bookable product
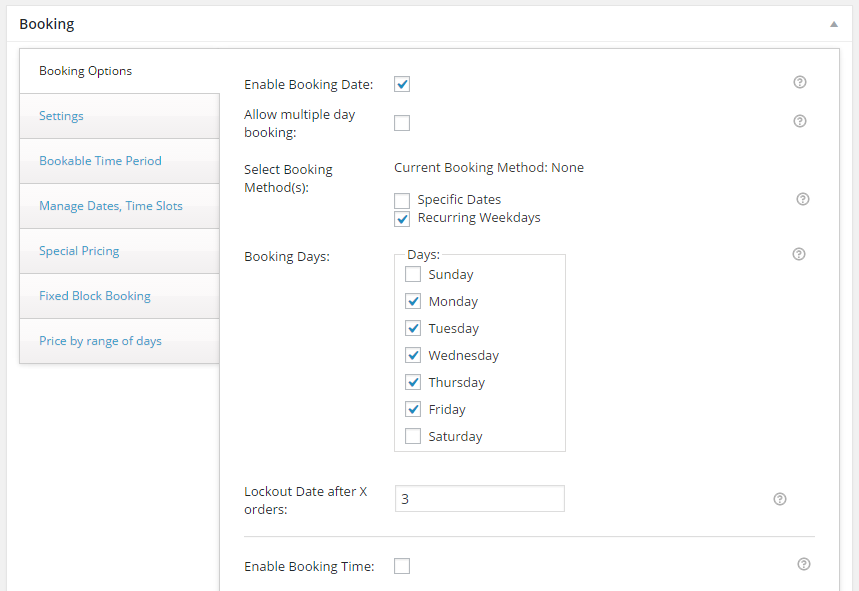
We need to first select the Enable Booking Date checkbox. This helps the plugin identify which products are bookable & which ones are not. This is very useful for stores that are selling bookable as well as non-bookable products.

If your bookings are recurring on some weekdays, then you can choose the Recurring Weekdays booking method. If your bookings are of non-recurring nature & instead are on randomly spread out dates, then you can choose the Specific Dates method.
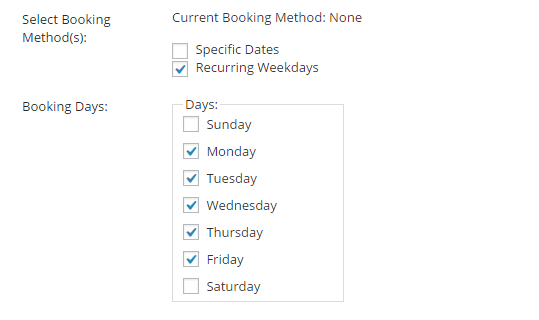
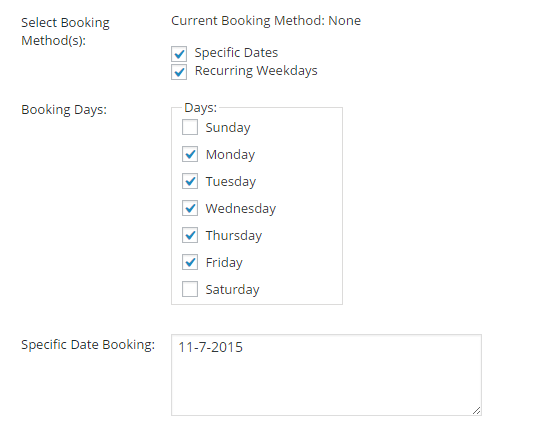
It is important to note here that you can also use both the booking methods at the same time. For example, your bookings could be recurring, like Monday to Friday, but you might want to accept bookings on one of the Saturdays too, which is not recurring. In that case, you simply select “Specific Dates” along with “Recurring Weekdays” and select the date which you want to open up for booking in the Specific Date Booking box.
The Lockout date after X orders setting allows you to keep a cap on maximum bookings for a date. It ensures that there is no over-booking on any particular date.
Step 4: Setup time slots for WooCommerce Bookable product
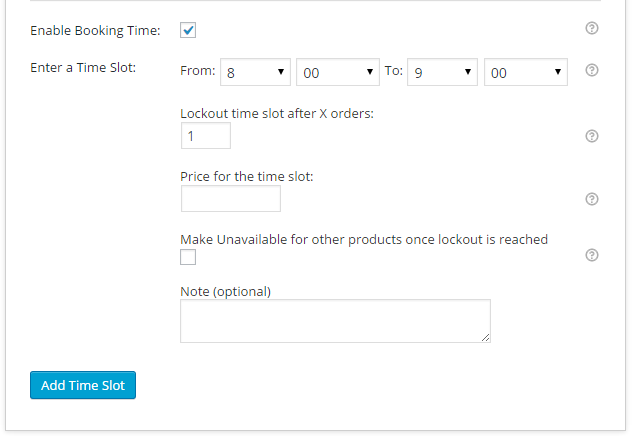
Since this is a date & time booking, we will be adding time slots. The time slots are added to the selected weekdays as well as to the specific dates, if that is enabled.
Once you select Enable Booking Time, the “Add Time Slot” button is enabled. It allows you to add multiple time slots.

You need to enter the start time & end time for the time slot. You can also leave the end time as is. This is especially useful for open-ended time slots, that only have a start time but no end time.

Similar to the dates, in time slots we have a Lockout time slot after X orders option. This allows to keep a cap on the maximum number of bookings to be taken for the time slot. If you are a doctor, then you could set this to 1. As soon as 1 customer books it, the time slot will be unavailable to other customers. If you are a Yoga instructor, you could set this to 5 or 10, depending on the maximum participants you want to allow in that class. After that many bookings have been completed, the time slot will be unavailable.
It is important to note that the date lockout should always be higher then the time slot lockout. This is because once the date lockout is reached, that date will automatically be unavailable for further bookings, even if the time slot lockout is higher. So if you have 2 time slots, and if you can take 5 bookings in each time slot, then your date lockout should be 10.

You are also able to enter a price for a particular time slot in the Price for the time slot field. This is very useful in cases where one wants to charge a higher price. For example, if someone in Los Angeles wants to schedule a conference call with me at 1 AM midnight as per India time, then I would want to charge them a higher fee compared to other time slots during the day.
We will leave this blank as we have only 8 AM, 9 AM & 10 AM time slots to schedule conference calls with me. Thank god! 🙂

The last option Make unavailable for other products once lockout is reached is used for cases where you only have a single person offering multiple services. For example, I could be scheduling conference calls with clients as well as I could be providing WordPress training. If I am booked for a conference call for 10 AM to 11 AM, then I can’t be available to do the training for that time. This setting works when the time slots across products have the same start time & end time. It will block the time slots for other products once the lockout is reached for any 1 product which has the time slot & the setting turned on.

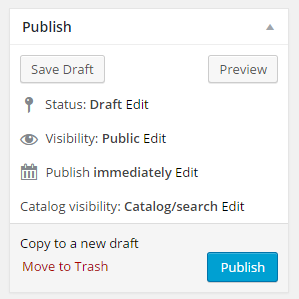
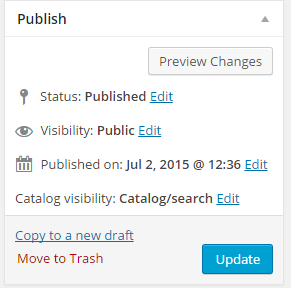
After the settings are configured, you need to click on the “Save Draft” or “Publish” button in order to save the booking settings & the time slots. If your product is already published, then you would need to click on the “Update” button.
Step 6: Manage Dates, Time Slots
Once the information is saved, the weekdays, specific dates & time slots would be visible in the Manage Dates, Time Slots tab.
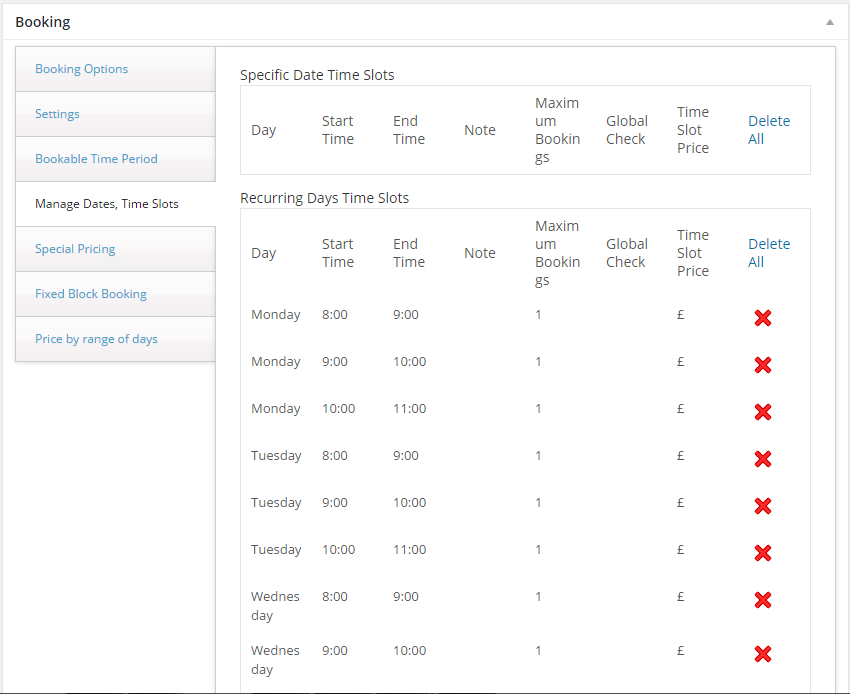
As you can see above, all weekdays & specific dates (if any), are listed here along with their time slots. If you want to delete a time slot for any particular weekday or specific date, you can do so from this tab.
Conclusion
This concludes the 1st part in this series on how to turn your WooCommerce store into a booking platform. I shall be posting the remaining parts in next couple of days. The 2nd part will be about the the user experience on the frontend pages for WooCommerce date & time bookings.
You can experience the full version backend demo here. For the corresponding frontend demo, click here.
If this is the right solution for you, go ahead & purchase the WooCommerce Booking & Appointment Plugin.


[…] the 2nd post in a series describing how to turn your WooCommerce store into a booking platform. In Part 1, we saw how a WooCommerce bookable product is created in the backend using the WooCommerce Booking […]